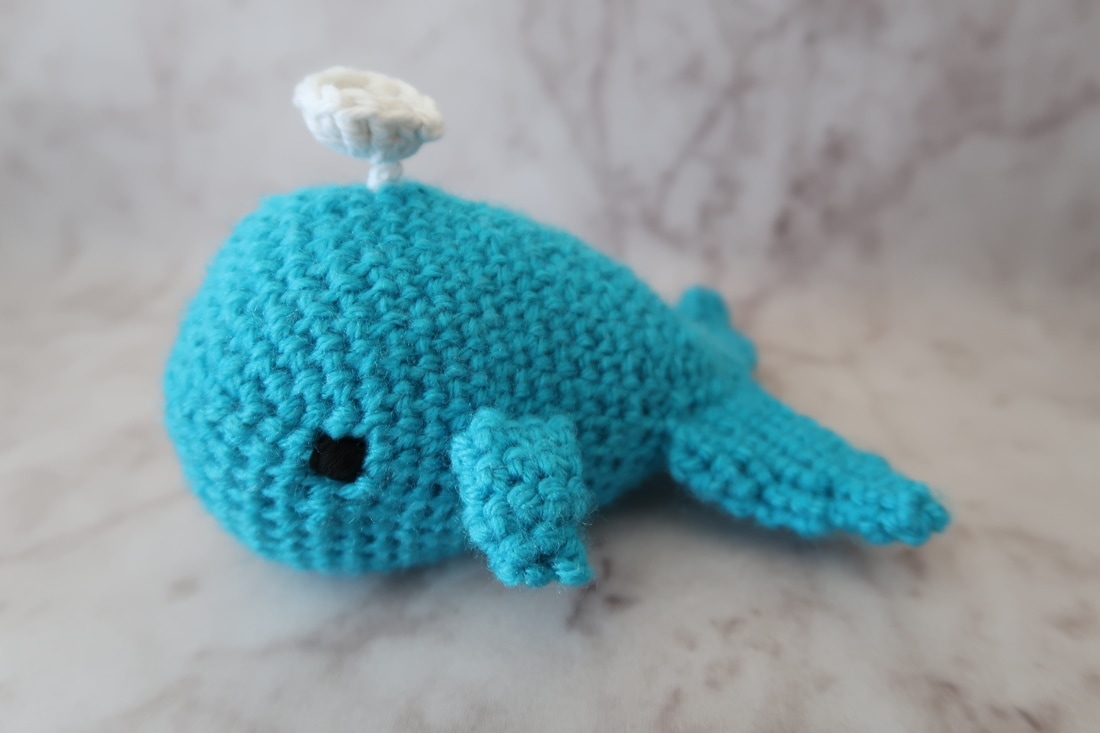
 Continuing on my quest to find "one day" projects, I decided to try this little whale found on Pinterest. There is a free pattern available online from "Pops de Milk" (popsdemilk.com/cutest-little-sperm-whale/). Before reading the free pattern online, I actually attempted to make one just by looking at the picture. Unfortunately I wasn't very satisfied with the body I made and wasn't sure how to make the tail, so I decided to take a look at the pattern. The pattern is clear and easy to follow: there is a list of materials needed, a stitch guide, and notes on what size hooks should be used. The pattern begins with the body which is worked in the round. After finishing rounds 1 to 14, my work looked more like a square rather than a circle. The increases in each round were "on top" of each other which made the front of my whale not as clean as I would have liked (please refer to picture below). 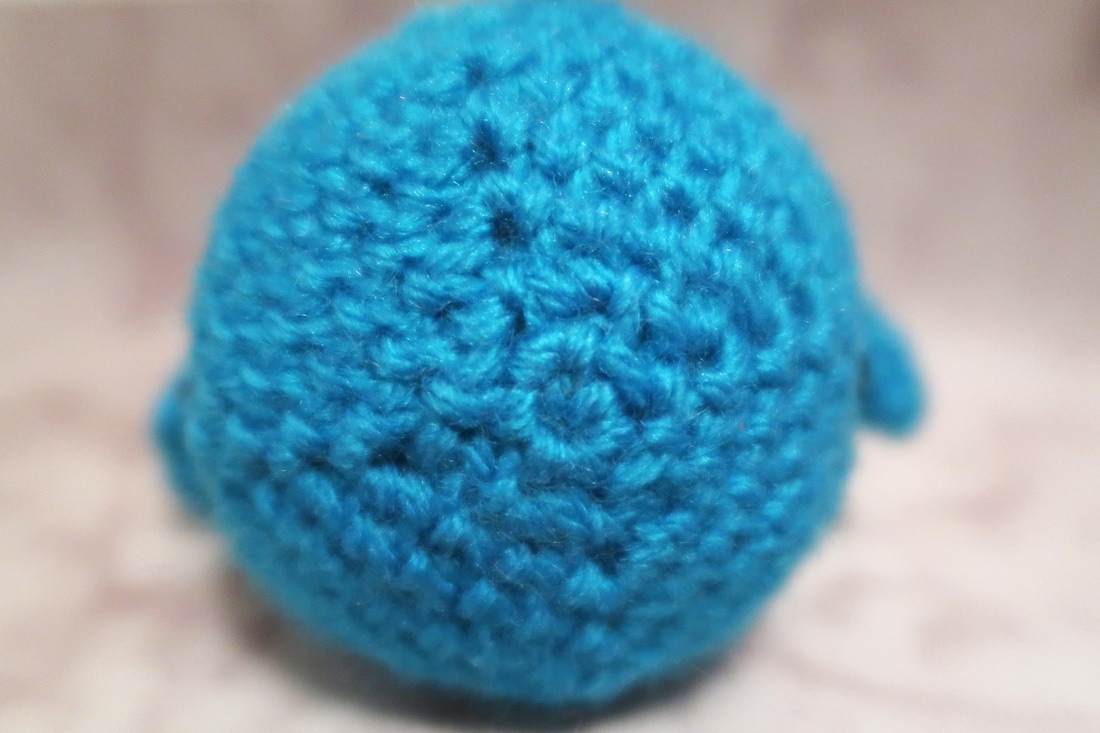 When making spheres, I have been following this amazing set of patterns:(mspremiseconclusion.wordpress.com/2010/03/14/the-ideal-crochet-sphere/). The writer has gone above and beyond creating patterns for different sized spheres; she has even done the math! Every sphere I've made following her patterns have been pretty close to perfect looking spheres (or "ideal" in the writer's case). If I were to make this whale again, I would modify it using one of the "ideal" sphere patterns. Other than the look of the front of the whale, I was very happy with the overall shape of the body. I should mention, I did not use the exact same size hooks the pattern called for (I don't own a 3.75mm or 3.00mm); for the body I actually used a 3.50mm hook and 2.75mm for the fins and flukes. Next came the flukes for the whale's tail. As mentioned above, I used a 2.75mm hook instead of a 3.00mm hook. Once I finished the flukes, I thought they looked a bit too big and not proportional to the size of the body. I considered re-making the flukes and altering the pattern to make them smaller, but I felt that was going to take too much work and time. I definitely did not want to re-make the whale's body bigger either so I kept my flukes as is. 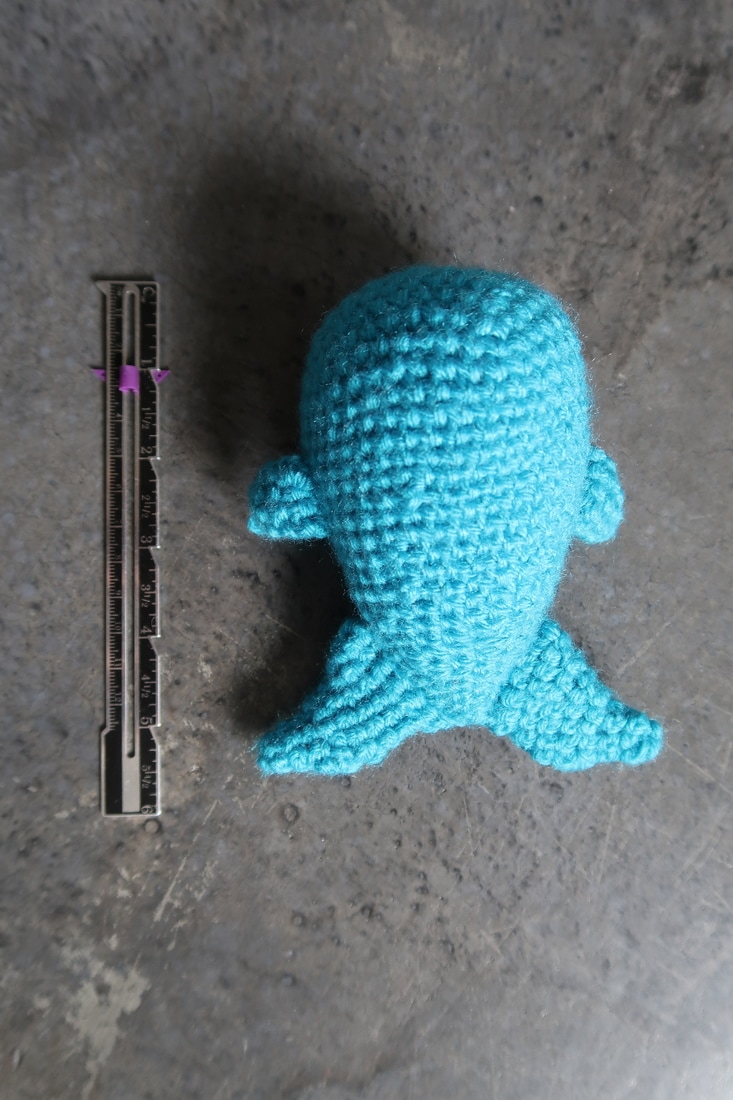 The pattern calls for 6 rounds to create the fins; however, I felt they were too long and reduced mine to only 4 rounds. I also added some "spray" from the imaginary blow-hole, which actually means my whale is no longer a sperm whale. Since I made the blow-hole on top, my whale is now a blue whale. The blow-hole on a sperm whale is actually located on the left side of a sperm whale's head! 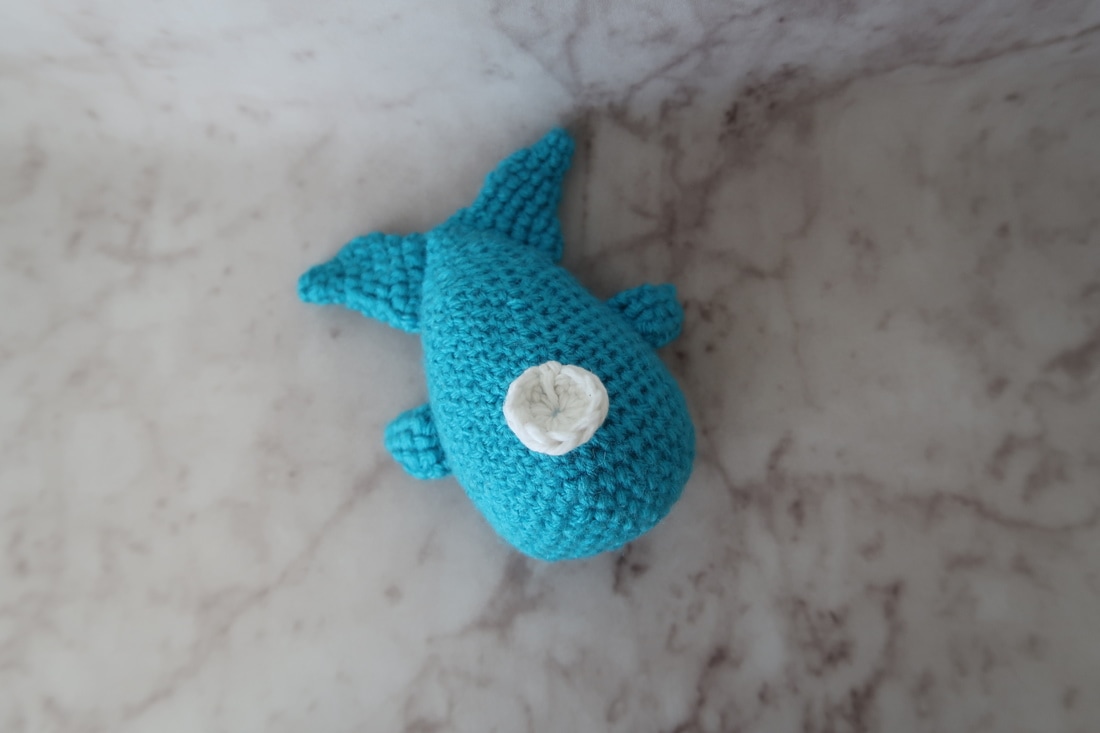 Other than the look of the front of the head, I was generally happy with this pattern. Things to keep in mind: - Don't forget to count your stitches and use stitch markers. - Be consistent with your stitch tension. - If you don't have safety eyes (like me) you can add some eyes using some embroidery skills. Blue Whale Materials: - 3.50mm hook for body - 3.00mm hook for flukes and fins - Lion Brand Yarn, "Vanna's Choice" in Aqua (body, fins and flukes) - Bernat Cotton yarn in Off White (blow-hole spray) - black embroidery thread (eyes) - fiber fill stuffing 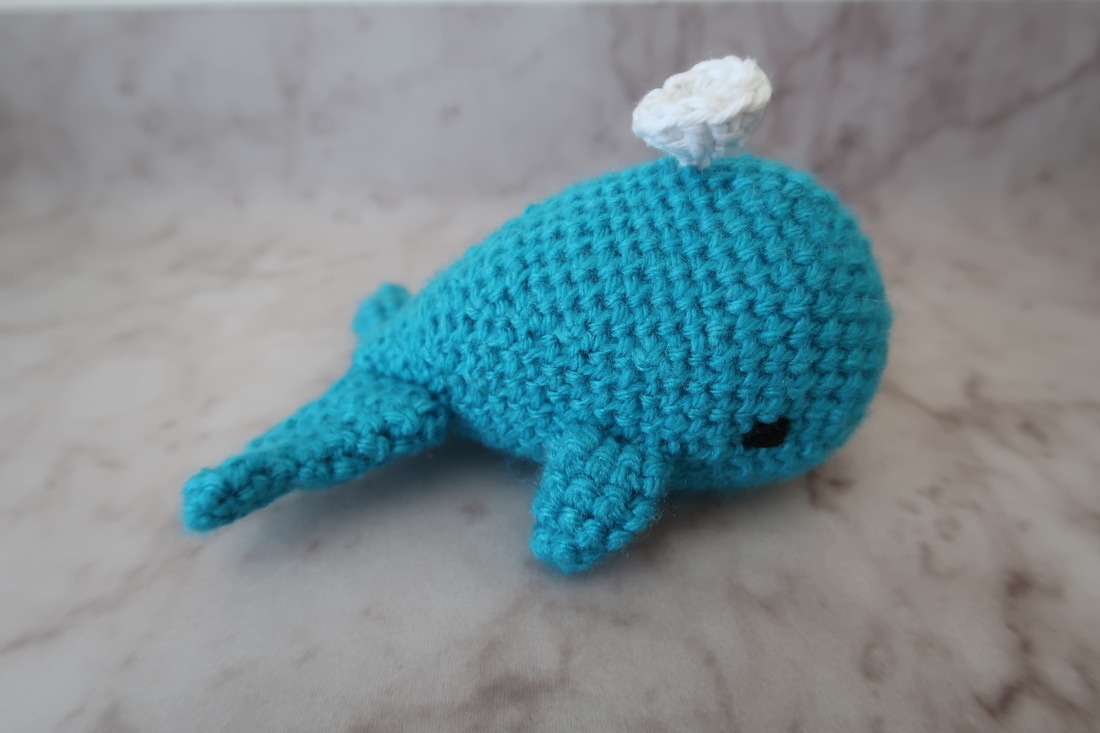
0 Comments
Leave a Reply. |
Melissa LuangsiripanyaHi there! I'm a self-taught casual crocheter. Here you will find more details on how I made my projects as well as stories of hardship, frustrations and success! Archives
July 2018
Categories
All
|
