|
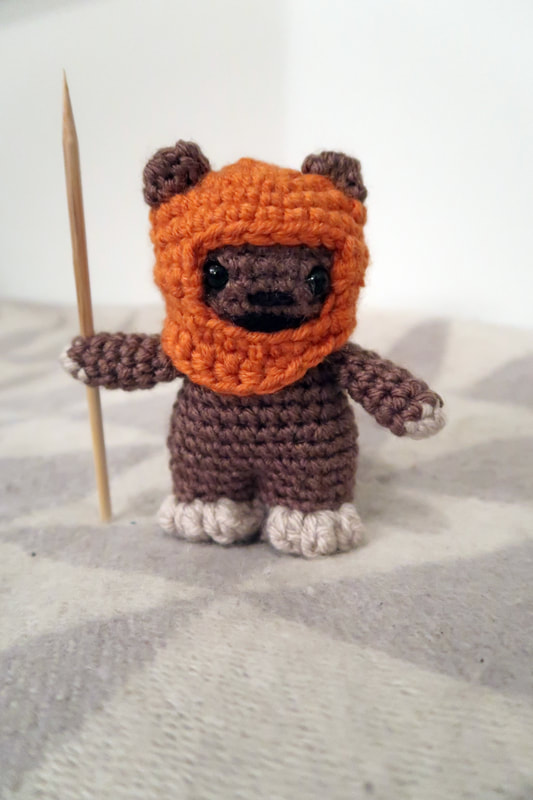
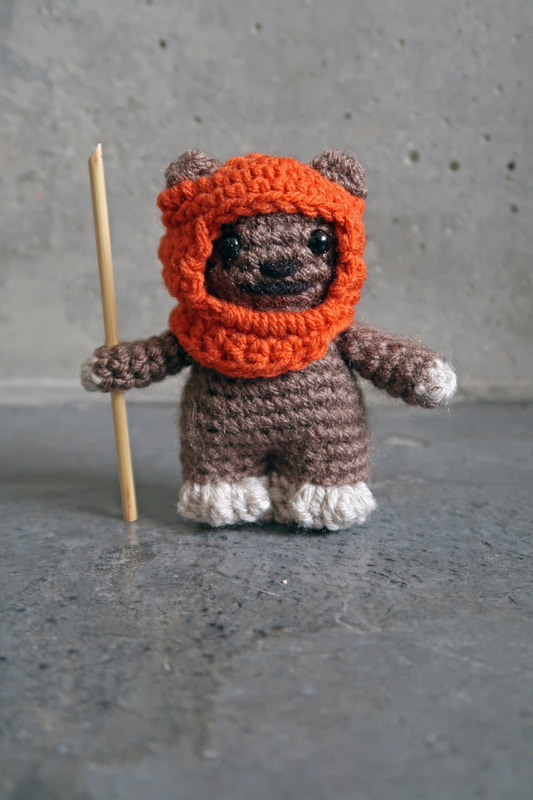
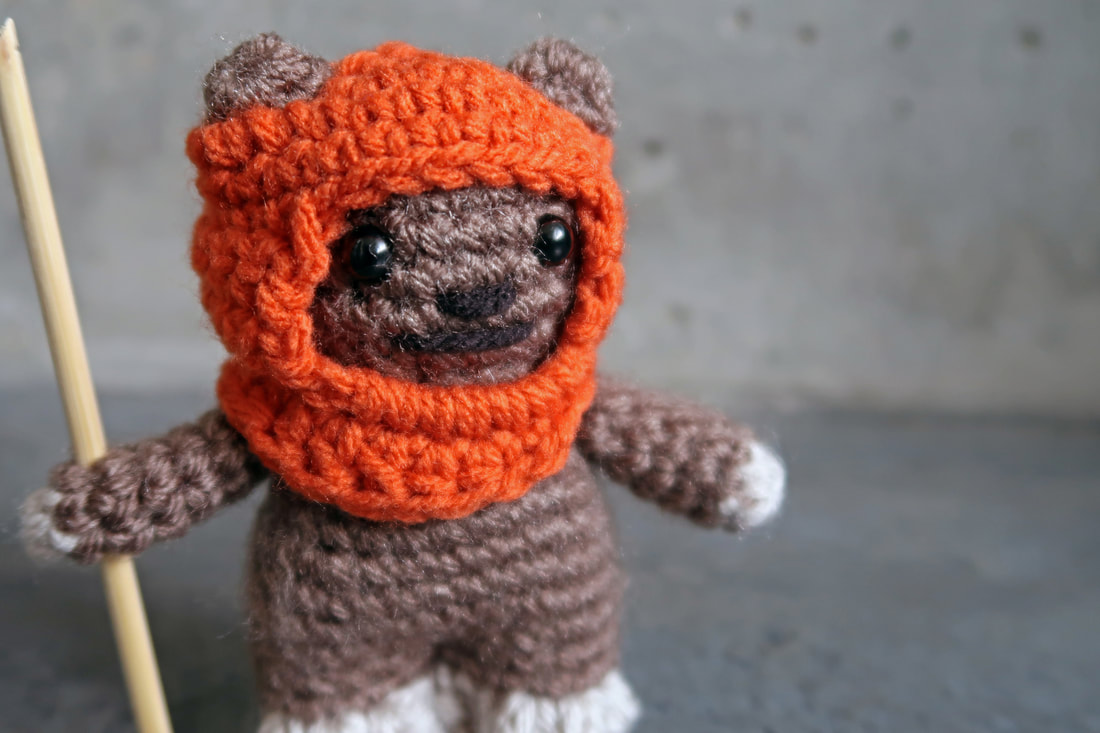
This must be one of the cutest things I have ever crocheted! So cute, I actually made two of these; the first of which I gifted to my sister which led to me making one for myself too. 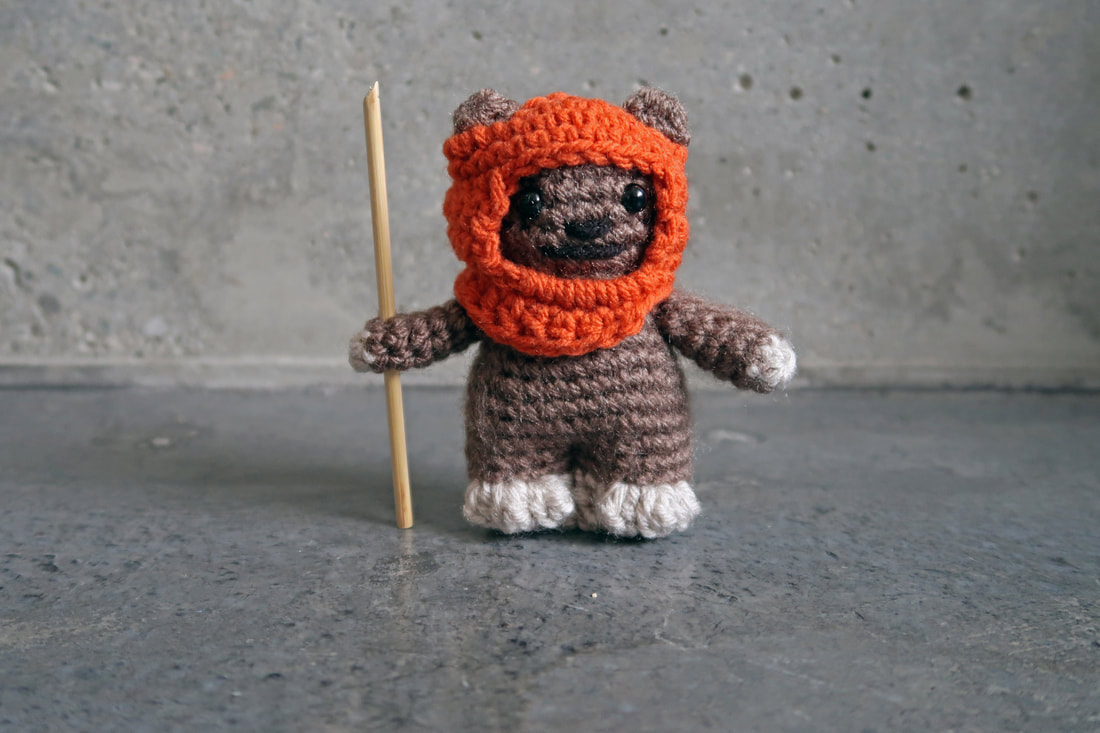 I have no complaints about the pattern by Lucy Collin - and why would I? He turned out so cute! Twice! Since I did make two, I did learn some things the second time around. On my first Wicket, I used Lion Brand, Lion's Pride Woolspun yarn (Pumpkin) for Wicket's hood. This yarn is a bulky weight [5] which made it a little difficult to work with a 3.5mm hook. So I would advise that you use a medium weight yarn [4] when using a 3.5mm hook.
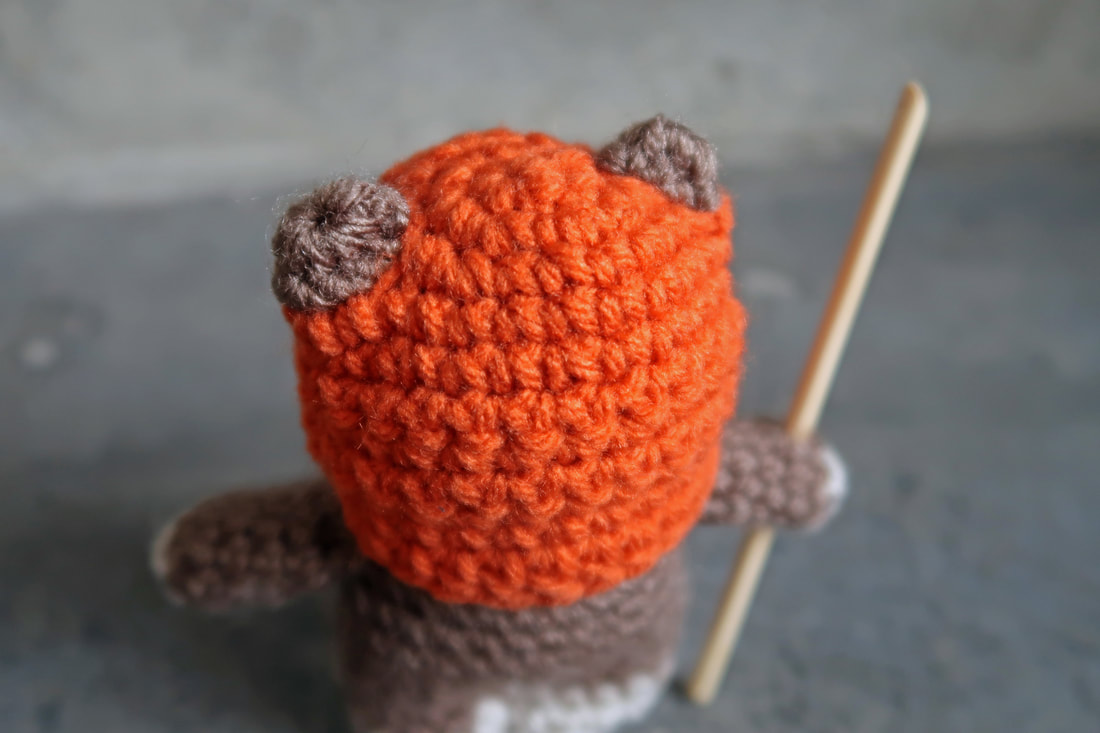
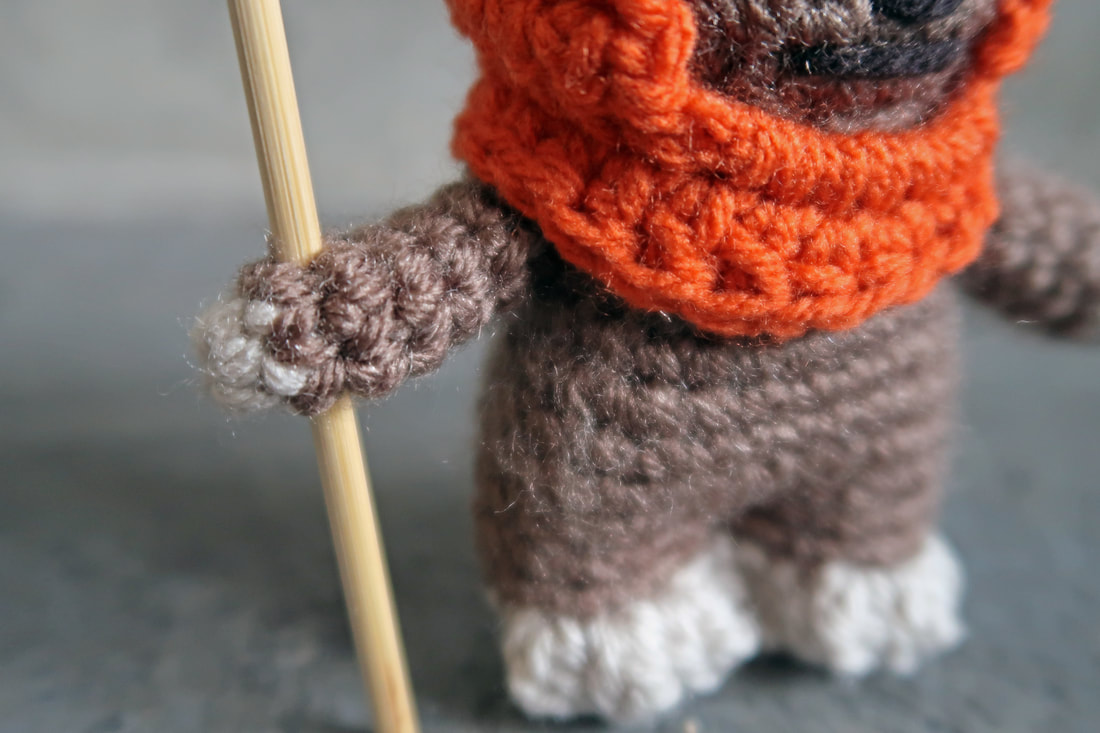
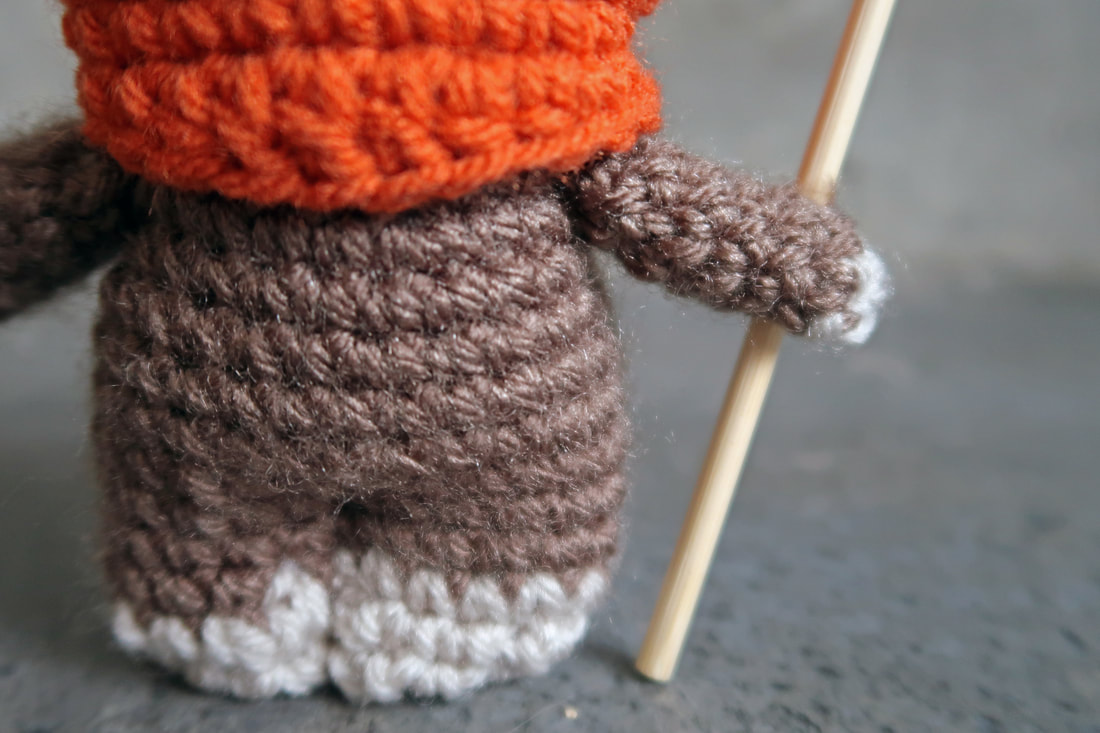
I also read the instructions incorrectly at the end of round 11 on the hood (this is the row directly below Wicket's mouth). Above is a side by side comparison of my first and second ewok. At the end of round 11, the instructions state to make 6 sc over a ch 6. Well, in the first ewok, I did not go over the ch 6, I stitched into the ch 6. Not a huge difference, but once you see it, you know it's different. As mentioned earlier, I used a bulkier weight of orange yarn the first time around. I really should have used a crochet hook larger than 3.5 mm to compensate for the heavier weight. As you can see, the first hood looks tighter and smaller; the hood's opening is smaller as well. On the second ewok, the hood is looser and drapes over the head nicely; you can also see Wicket's entire face. 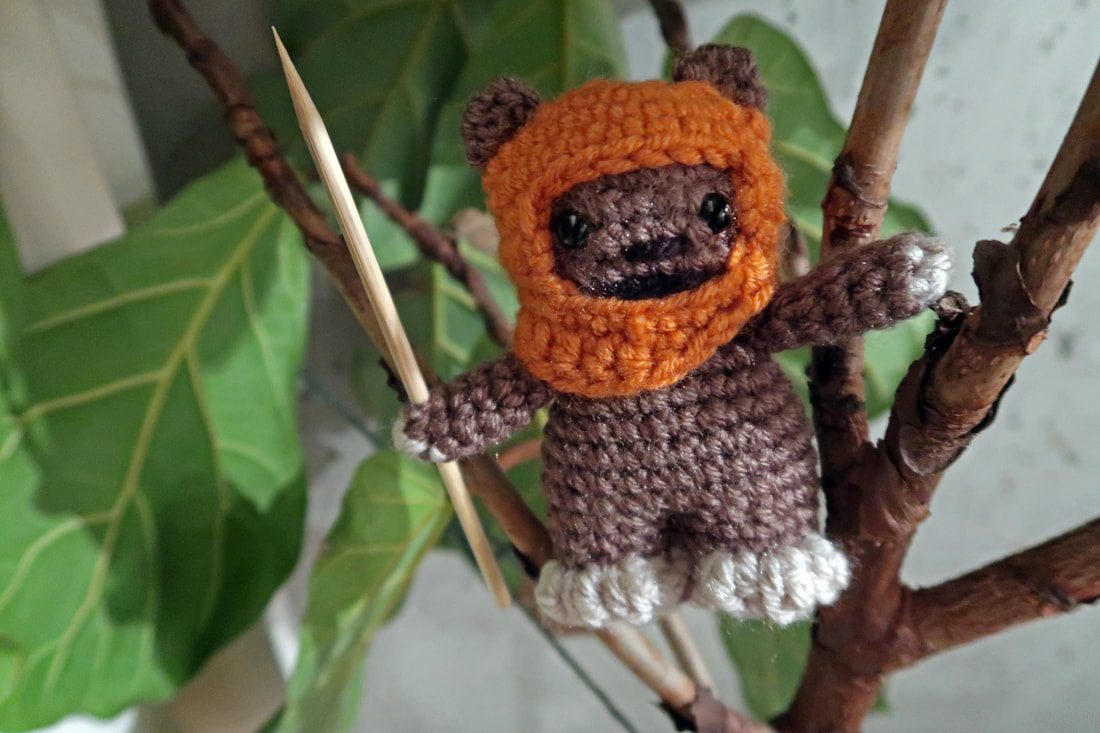 Both ewoks are approximately 4.7 inches tall; the finished size in Lucy Collin's book is listed as 3 inches tall. The photo of her ewok is also shown holding a toothpick; I ended up cutting a couple sections from a bbq skewer to make Wicket's spear as a toothpick would be much too small.
Pattern (not mine): http://www.lucyravenscar.etsy.com
Materials used: 3.5mm crochet hook, stuffing, safety eyes, bbq skewer. 1. Wicket's body: Lion Brand Vanna's Choice in Taupe; medium weight [4]. Approximately 20g needed. 2. Wicket's hands and feet: Lion Brand Vanna's Choice in Linen; medium weight [4]. Approximately 5g is needed. 3. a) Wicket's hood (The First): Lion Brand Lion's Pride Woolspun in Pumpkin; bulky weight [5]. Approximately 5g is needed. b) Wicket's hood (The Second): Loops & Threads Impeccable in Pumpkin; medium weight [4]. Approximately 5g is needed. A small amount of black yarn is also needed for Wicket's nose and mouth.
1 Comment
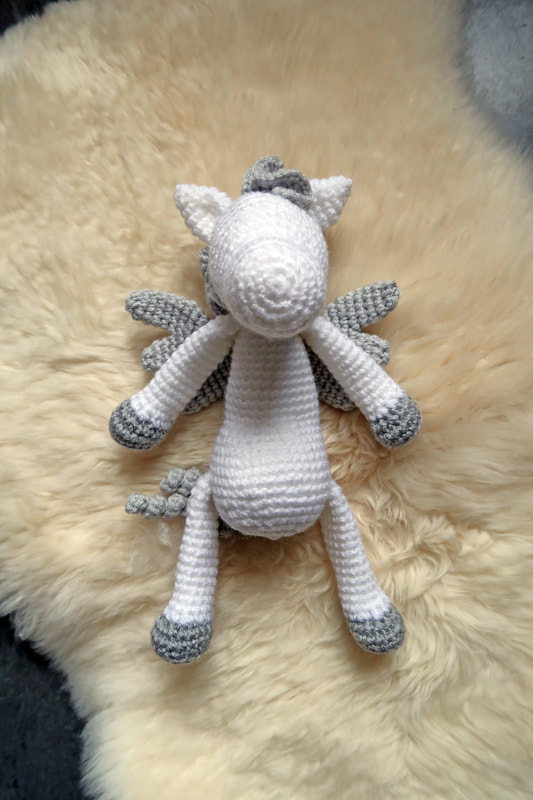
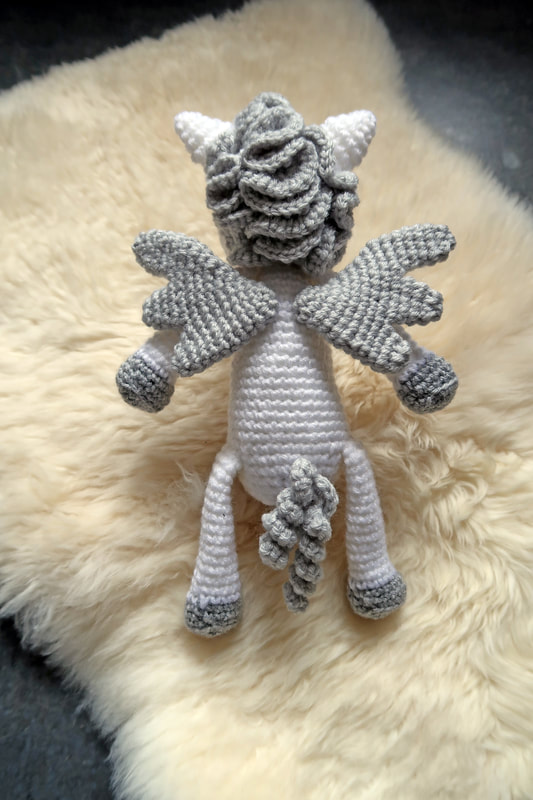
Pegasus was created using my own pattern which is based off of the same pattern I created for my unicorn.
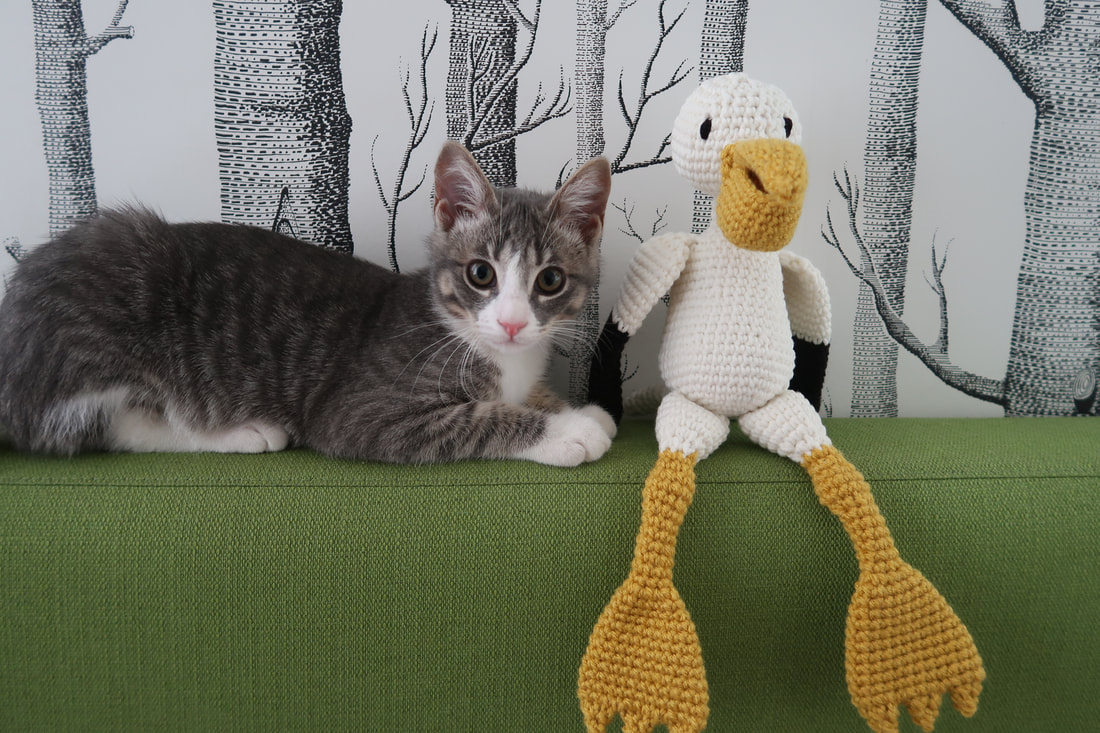
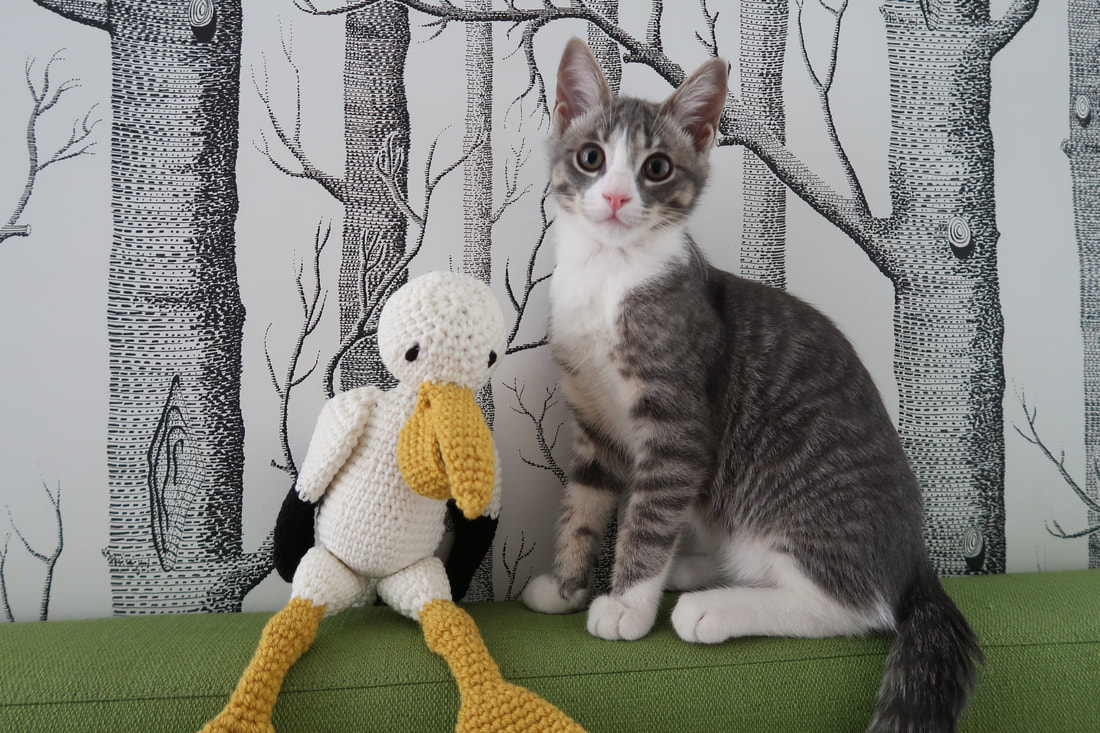
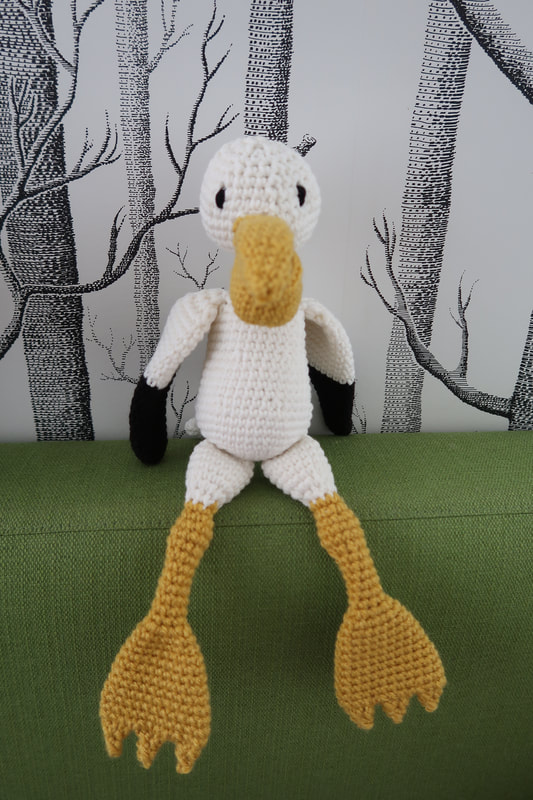
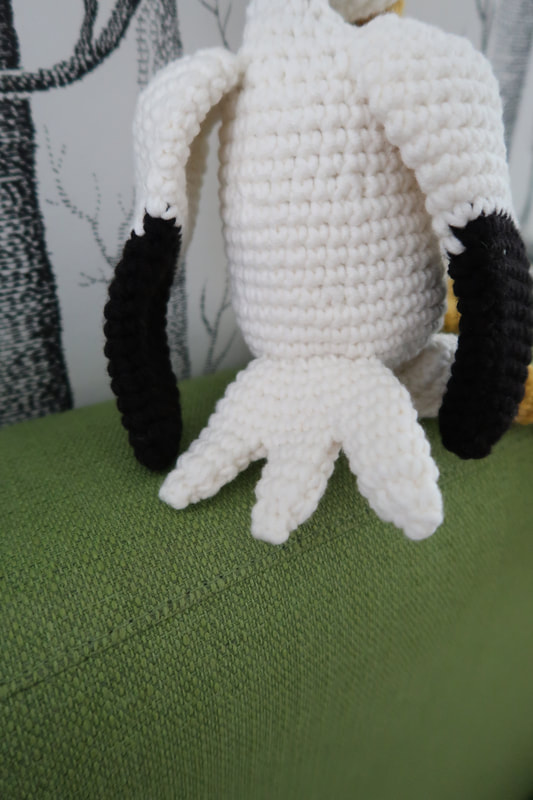
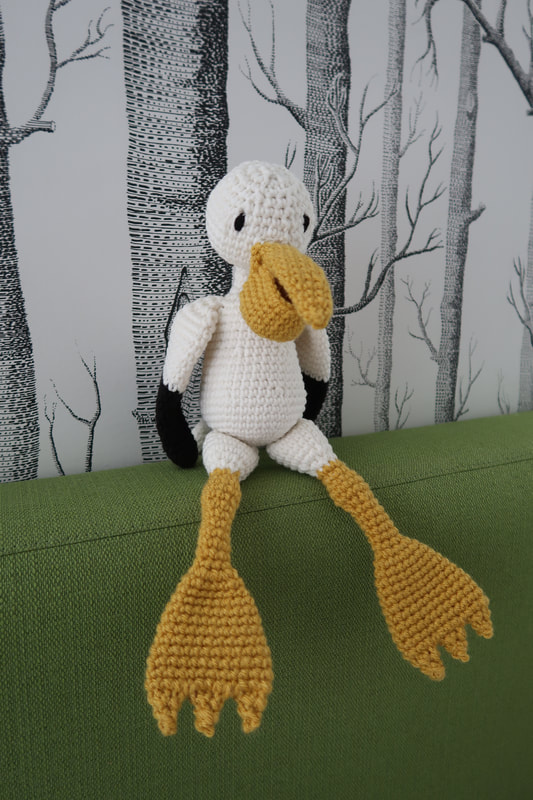
Materials used: 4.25 mm crochet hook 1. Lion Brand "Vanna's Choice" in white (medium weight [4], 156m/100g). 2. Lion Brand "Vanna's Choice" in pale grey (medium weight [4], 156m/100g). 3. Lion Brand " Vanna's Choice" in silver heather (medium weight [4], 156m/100g). Stitches: Slip Stitch Chain Single crochet Techniques: Magic circle Crochet in the round Increase Invisible decrease Colour switching Branching Hand-sewing Another bird completed from the book "Edward's Menagerie - Birds" by Kerry Lord. Huck the Pelican is a level 1 bird with respect to difficulty. I chose Huck as I really wanted to make that gorgeous pelican beak. After having completed Sophia the Flamingo, this bird was relatively straight forward. I think I'm really starting to get the hang of sewing limbs/parts together too! 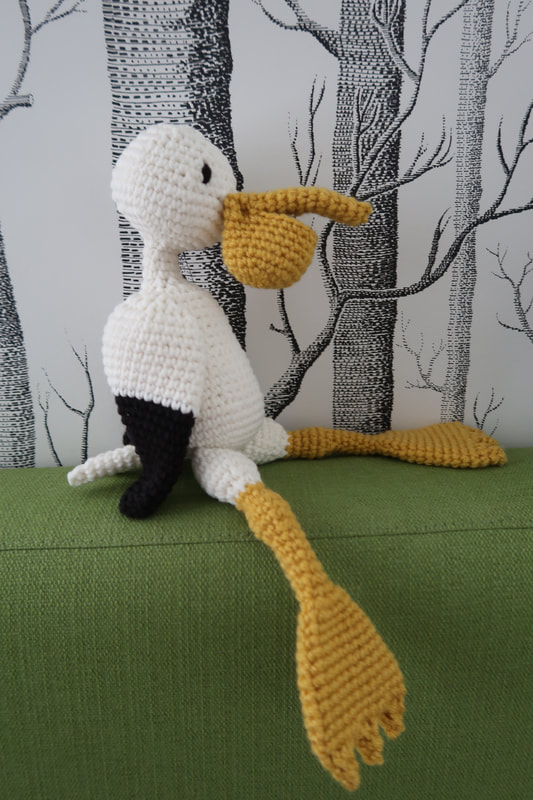 I had a much easier time making the feet and claws this time around, thanks again to having made the flamingo. It was even easier as I didn't have to change colour. In the pattern it is suggested that you may sew the beak closed, or leave it open to fit fish in! I decided to leave mine open, but unfortunately haven't had the opportunity to make any fish. 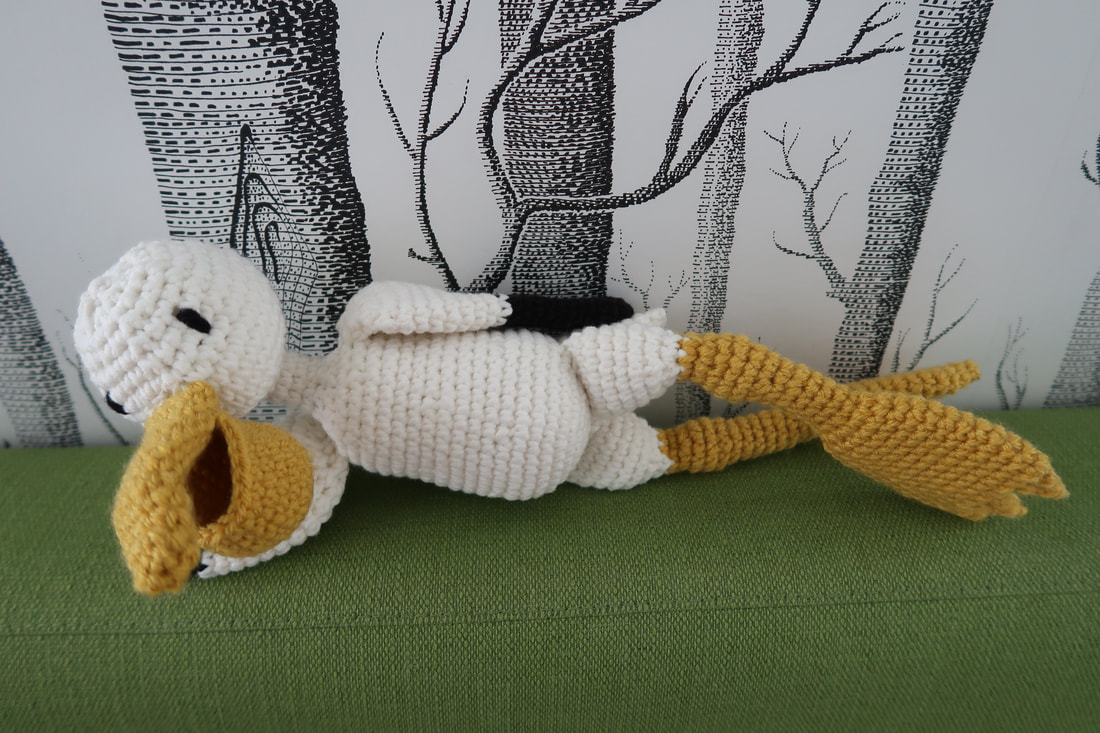
Do you own "Edward's Menagerie - Birds"? What birds have you made? Materials used: 3.5 mm crochet hook 1. Loops & Threads, Ringspun yarn in Off White (medium weight [4], 145m/100g); I used the leftover ball of yarn used from making my first BB-8. 2. Lion Brand, Vanna's Choice yarn in Mustard (medium weight [4], 156m/100g; I estimate that approximately one third of the ball of yarn was used. 3. Loops & Threads, Impeccable yarn in Black (medium weight [4], 245m/128g; I estimate I used less than one third of this ball of yarn.
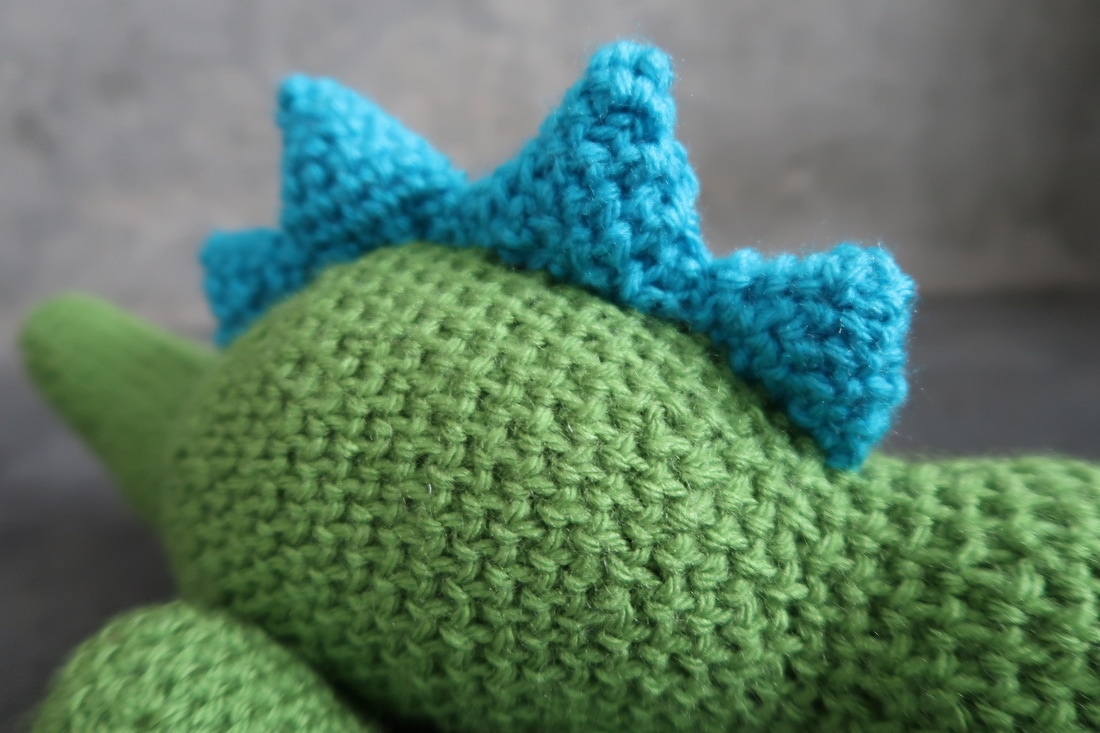
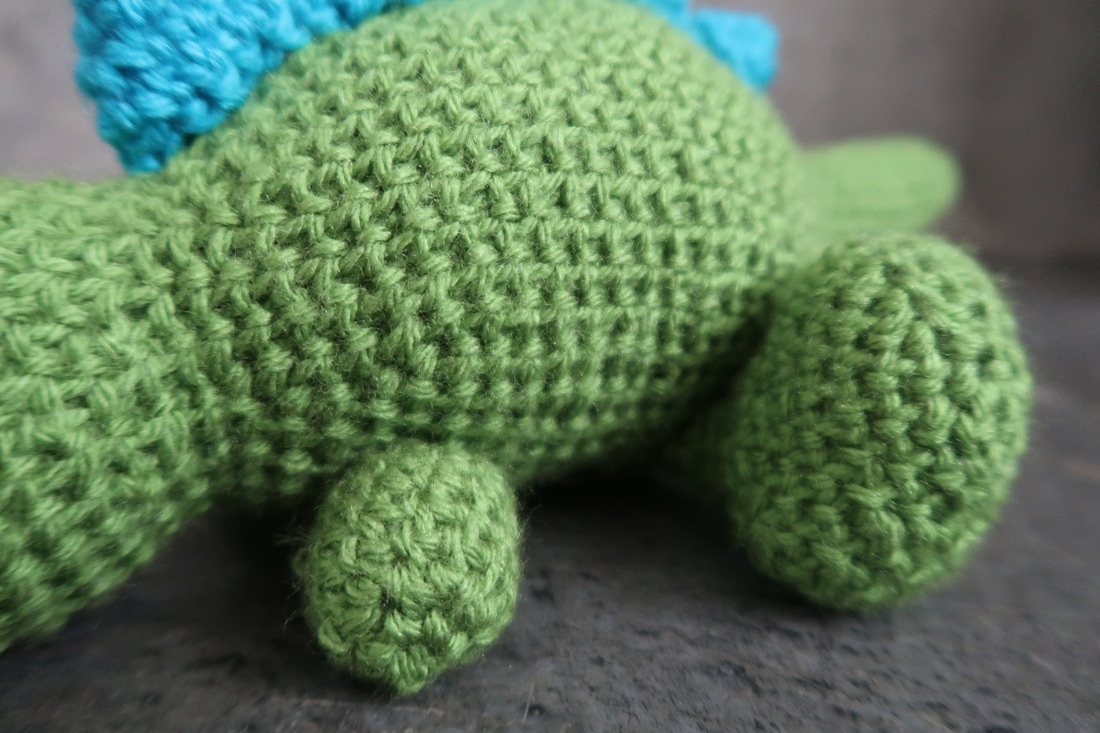
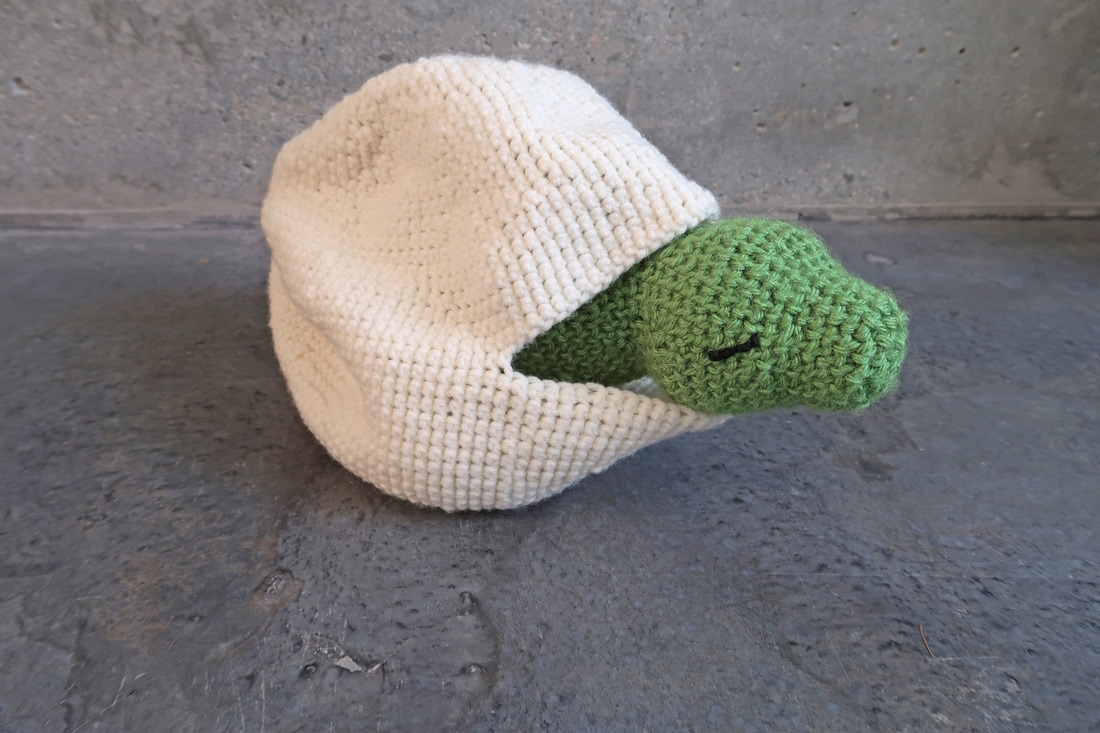
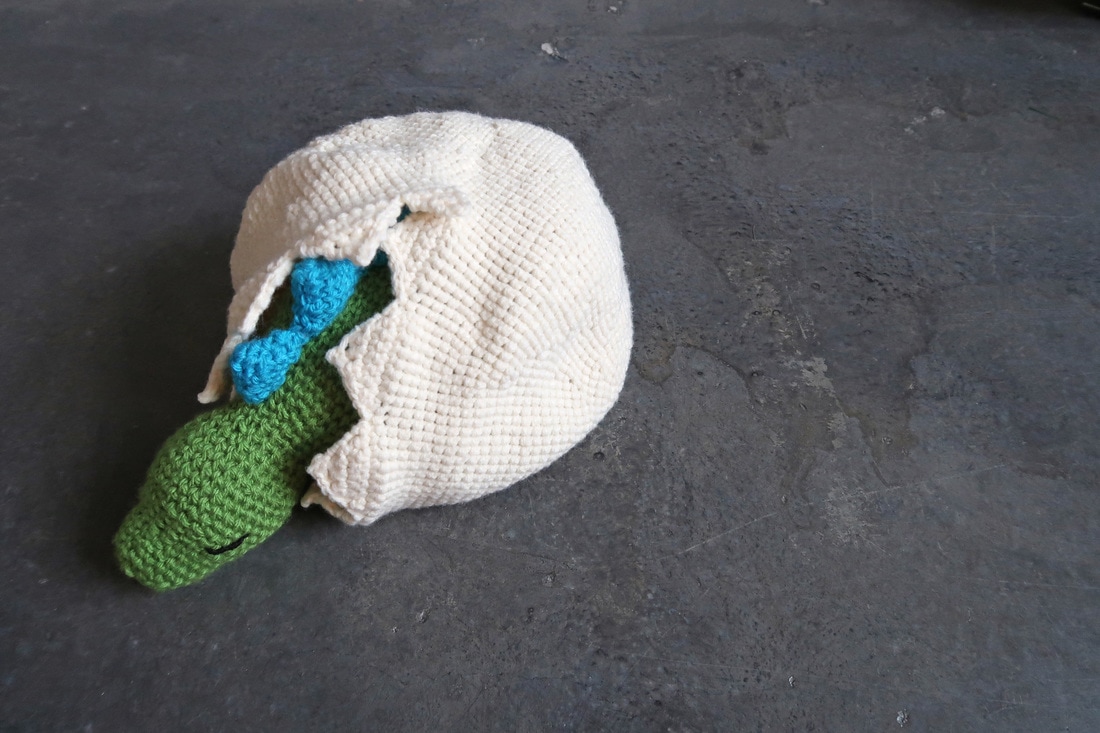
The best crochet projects are the ones that I'm gifting. The thought of smiles on my friends faces and an image of their future little one holding this - priceless. With their first child on the way (a boy!) and a love for dinosaurs by the parents-to-be, I couldn't resist making this baby dino for them. 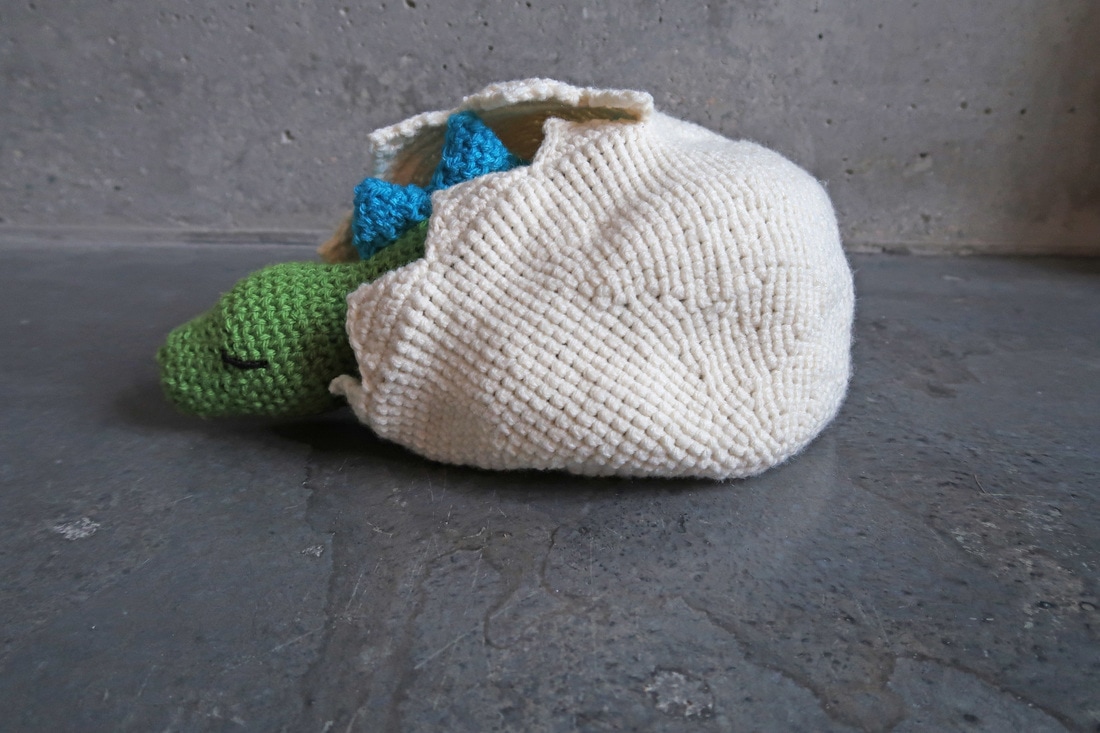 To my surprise, this dinosaur was one of my quickest projects to make so far. The body is one piece created starting at the head and continuing on to the tail. All limbs were made separately, stuffed and sewn to the ventral side of the body. All four dorsal spikes are individual triangles which were lightly stuffed and sewn to the body.
I tightened up my tension and used a smaller hook than when I created the unicorn. This resulted in a firmer body. In some situations that may not be ideal, but I think it adds to it's durability as I imagine the baby will be squeezing and handling the dinosaur a lot. Attaching limbs is my kryptonite. I usually attach limbs, undo it all and re-attach them a few times before I am satisfied with the placement. This dinosaur was no exception as I struggled with attaching the rear legs. At first I placed them too far ventrally (towards the belly), then too far out on the sides; I was trying to get to that happy place where it looked like the dinosaur just flopped down and took a nap. If you want to avoid all the attaching and re-attaching I went through, I highly recommend using stitch markers to loosely attach the limbs and mark the exact placement. When I completed the dinosaur I felt like something was missing. That is when I came up with the idea of making an egg from which the dinosaur could "hatch" from. I didn't want to sew two halves together so at the mid-point (row 28), I added stitches to the round like normal, but only halfway, and then I made a chain the length of the remaining number of stitches in the round to create the 'break' in the egg. Then in the next row, I stitched through the chain I had just created and half of the original round. After that, it was business as normal and I continued making the second half of the egg. The triangular edging was added once the egg was completed and what a difference the edging makes! 2018.07.23 Pattern now available!
Baby Dino Materials: - 4.25mm hook - Lion Brand Yarn, "Vanna's Choice" in Fern; 170 yds, 3.5oz/156m, 100g [medium, 4]; 1 ball. Used for the Dino body. - Lion Brand Yarn, "Vanna's Choice" in Aqua; 170 yds, 3.5oz/156m, 100g [medium, 4]; 1 ball. Used for Dino dorsal spikes. Dino Egg: - 4.25mm hook - Loops & Threads, "Impeccable" in Aran; 277yds, 4.5oz/253m, 127.5g [medium weight]; 1 ball 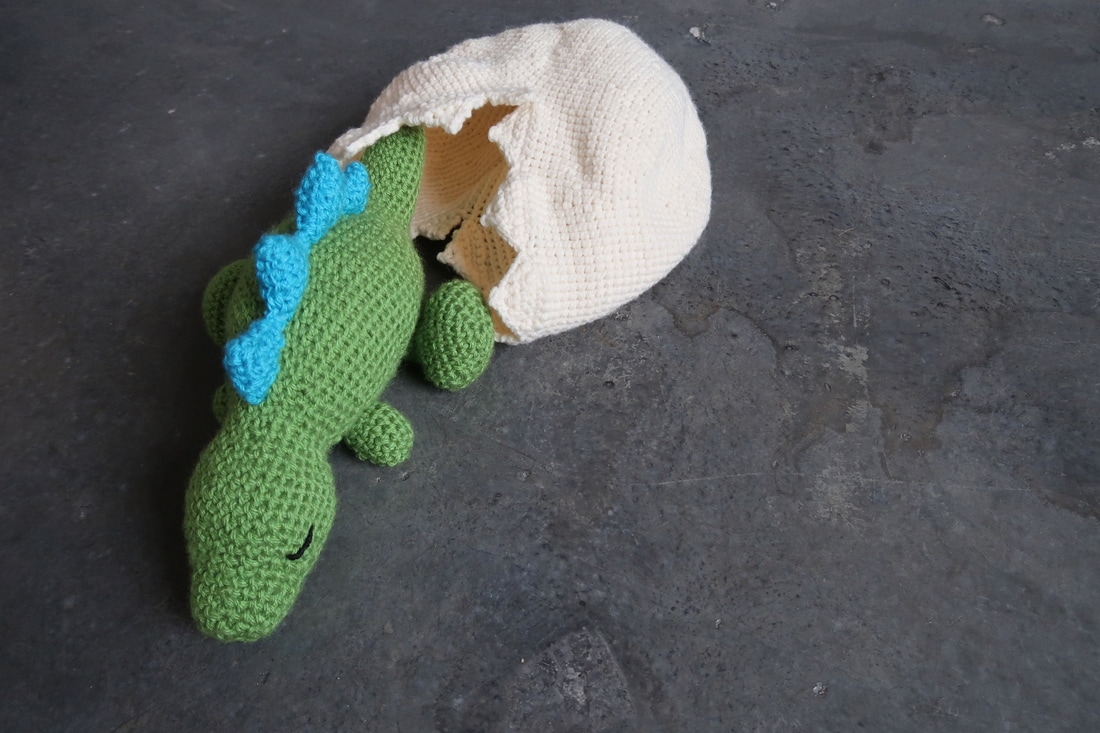 So far, many of my projects have been inspired by Pinterest. When I find my next project I try not look up if there is an existing pattern, and even if there is, I try not to look at it. I find it both challenging and fulfilling to plan and create my own patterns based on looking at a picture. It's like figuring out a puzzle but in the case of crochet, I get to figure out the number of stitches, rows and shapes required. This also allows complete customization and the ability to create a project to a size that works for me. I find it's best to break down a project into its most basic parts or shapes. Let's take my unicorn as an example. This unicorn has three main sections: a head, a body and limbs; each section can be broken down into their own basic shapes. From my post "First (successful) attempt at Amigurumi" I noted a few shapes which I believe are key to know in order to make Amigurumi. To complete the unicorn I needed to understand these shapes: sphere, cylinder, tube, cone and triangle. 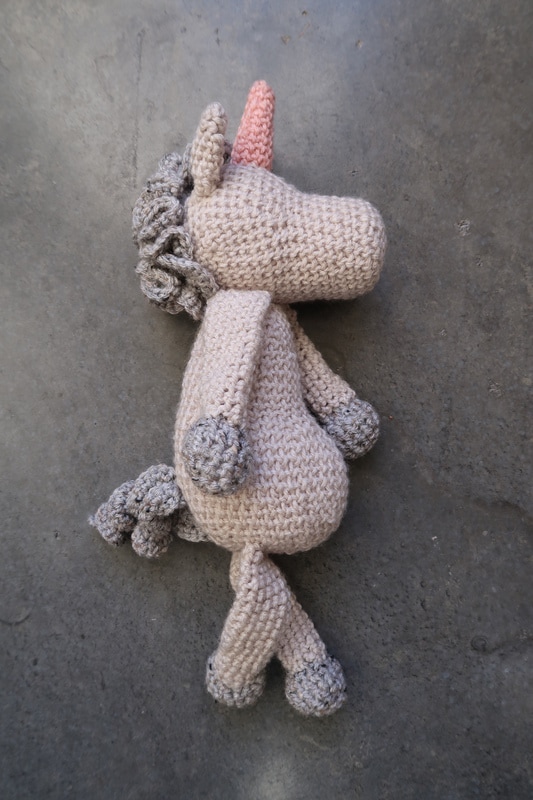 Let's look at the head first: the head has a mane, horn and ears attached; break it down even further, the head is a sphere attached to a cylinder (the snout), the horn is a cone and the ears are triangles (flattened/not stuffed in this case). The mane isn't actually a basic shape in this case.* 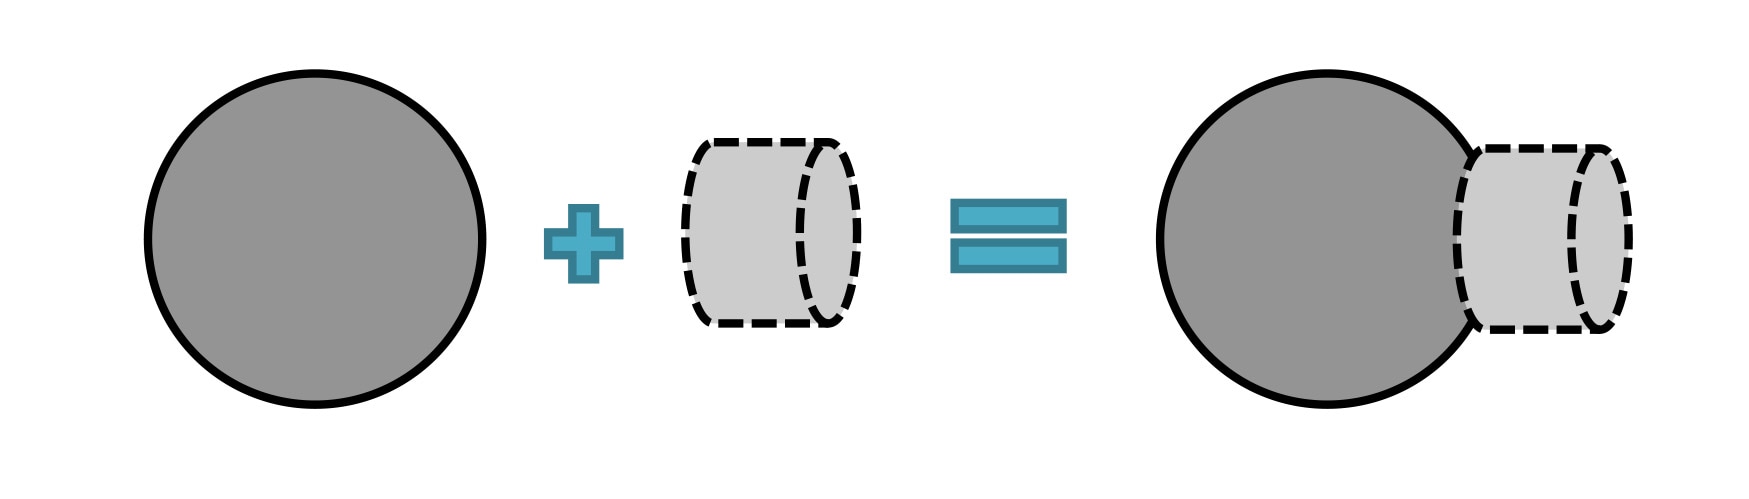 Before I start a project, I map out a formulaic pattern. This way I can plan what shapes I need to make and how many of each. Then I determine size and how to connect them all. Below is an example of my "unicorn formula". 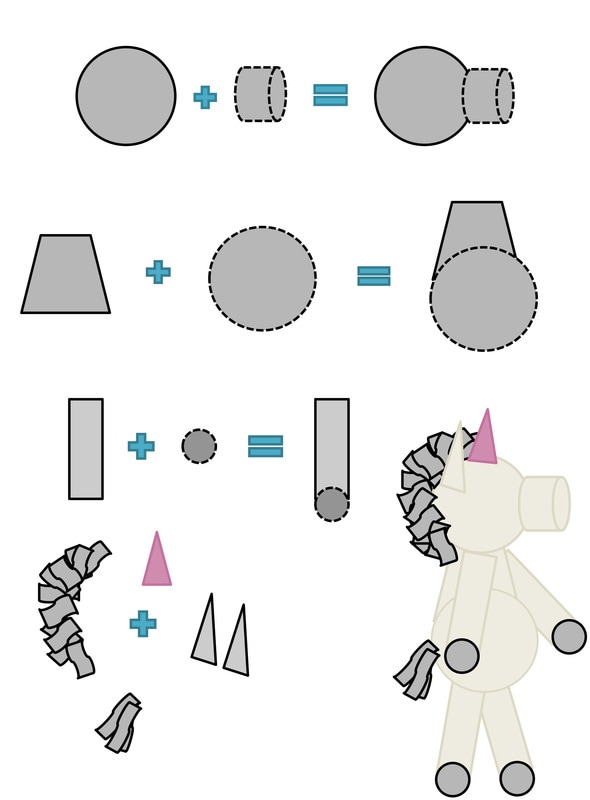 Breaking down the unicorn into basic shapes makes the project look less intimidating, especially if you've had lots of practice making these shapes. Once you're reached this level, the next step is learning how to connect all the shapes together. It's important to know when and where within a shape to increase/decrease and even more important that you count your stitches. For example, as I was building the unicorn's body, I added evenly spaced increases to the 'cylinder' thus turning it into a wide cone. I then added increases to only one side of the cone to create the belly; this way the unicorn has a 'back' on one side and a 'belly' on the other. By keeping things simple and a plan laid out, this helps make the project repeatable and easy to follow. This method works for me and hopefully it can help you too when you are planning your next project. Everyone learns differently though and I'm always looking for ways to increase efficiency, so if you have any tips I would love to hear them! *The mane is completed by first making a row of X number of sc stitches, and then in each consecutive row after that, you make an increase in every stitch. This results in a beautiful curly mane. The same technique is used for the unicorn's tail as well.
Unicorn Materials: - J size hook (6 mm) - 1 ball (156 m) of Lion Brand Yarn "Vanna's Choice" in Linen (medium; 4): used for body - 3/4 of ball (133 m) of Lion Brand Yarn "Vanna's Choice" in Grey Marble (medium; 4): used for mane, tail, hands and feet - Lion Brand Yarn "Vanna's Choice" in Pink (medium; 4): used for horn. |
Melissa LuangsiripanyaHi there! I'm a self-taught casual crocheter. Here you will find more details on how I made my projects as well as stories of hardship, frustrations and success! Archives
July 2018
Categories
All
|