|
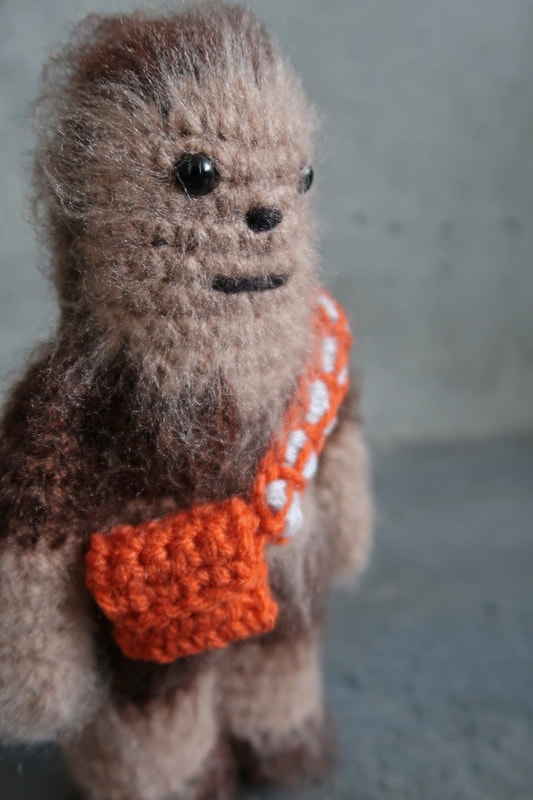
My Chewbacca turned out better than I thought. I was concerned that there was too much contrast between the two hair colours I had chosen. But once I had brushed the yarn, my anxiety was put to rest.  Chewbacca is approximately 7.5" tall. On his own, Chewbacca doesn't seem to stand very tall, but next to the rest of the Star Wars gang, you can see that he indeed stands taller than the rest. With the exception of R2-D2, all characters were created using medium weight [4] yarn and a 3.5mm crochet hook. 
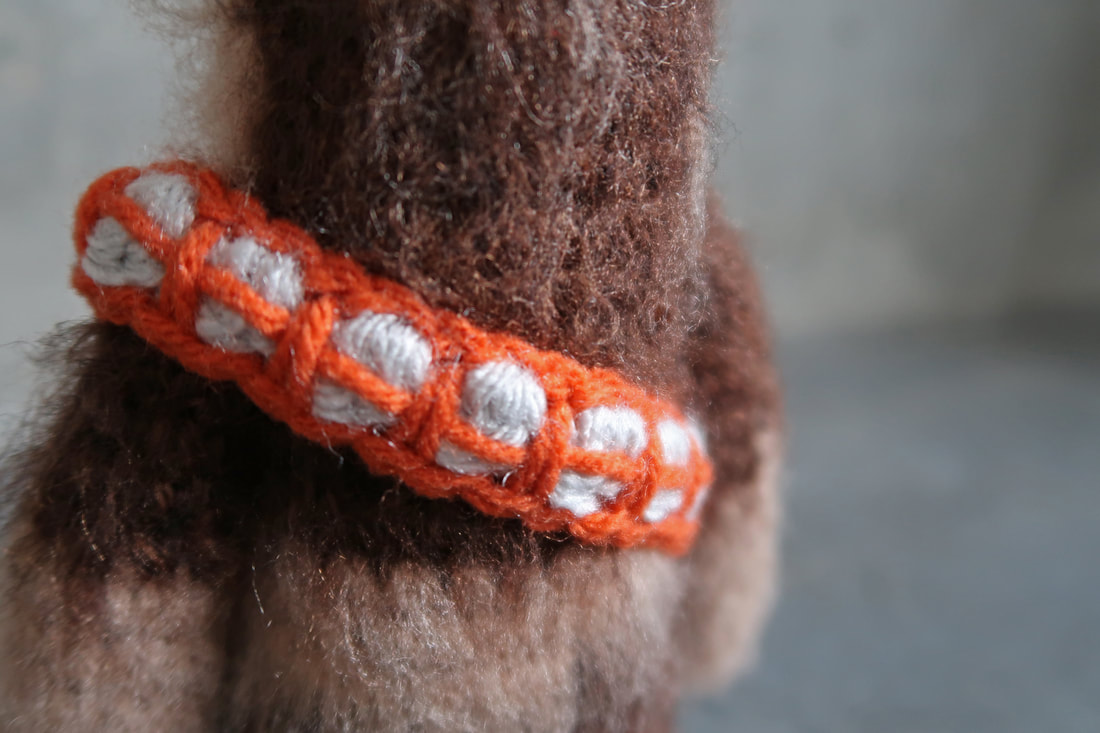
Materials used: 3.5mm crochet hook, stuffing, safety eyes (7.5mm). Chewbacca's hair is made with two different colours: 1. Lion Brand Heartland in Sequoia; medium weight [4], 100% acrylic. Approximately 15 g needed. 2. Loops & Threads Impeccable in Soft Taupe; medium weight [4], 100% acrylic. Approximately 15g needed. Bag and Bandolier: 3. Lion Brand Vanna's Choise in Pale Grey; medium weight [4], 100% acrylic. Less than 5g needed. 4. Loops & Threads Impeccable in Pumpkin; medium weight [4], 100% acrylic. Less than 5g needed A small amount of black yarn is also needed for Chewbacca's nose and mouth. 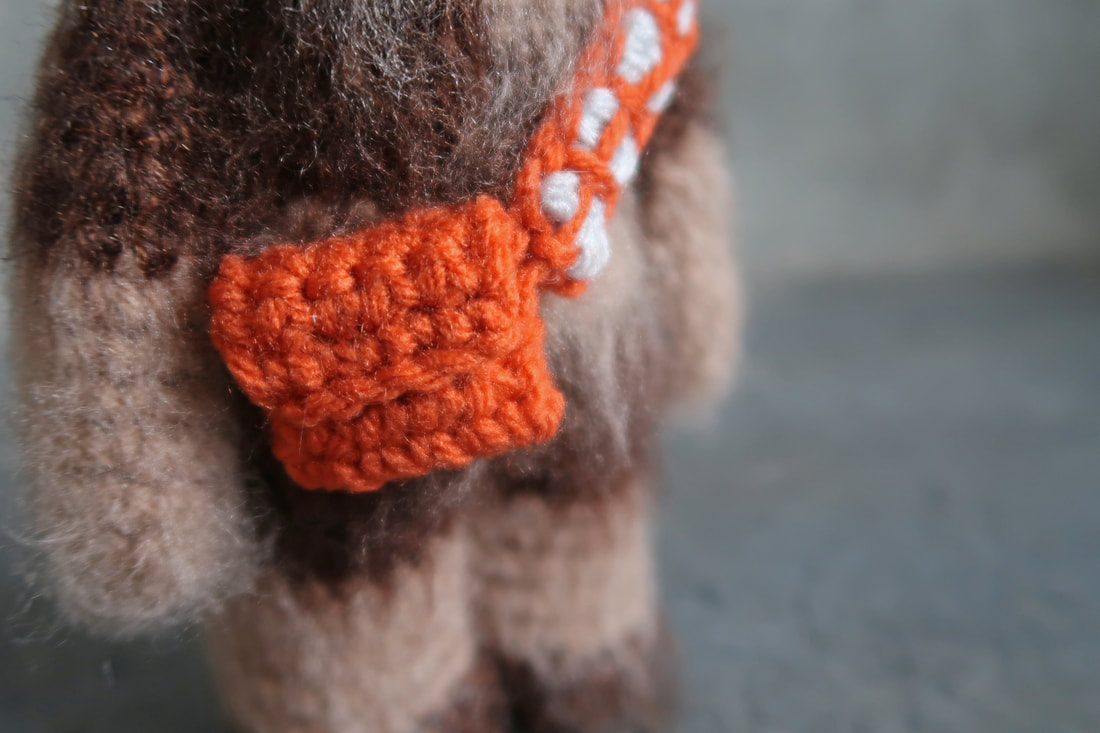 The bag is sewn shut to prevent the top from flipping upwards.
3 Comments
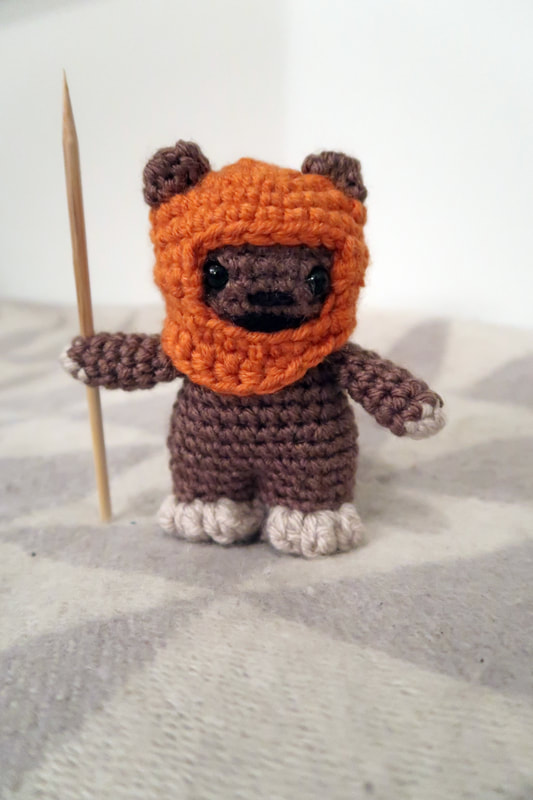
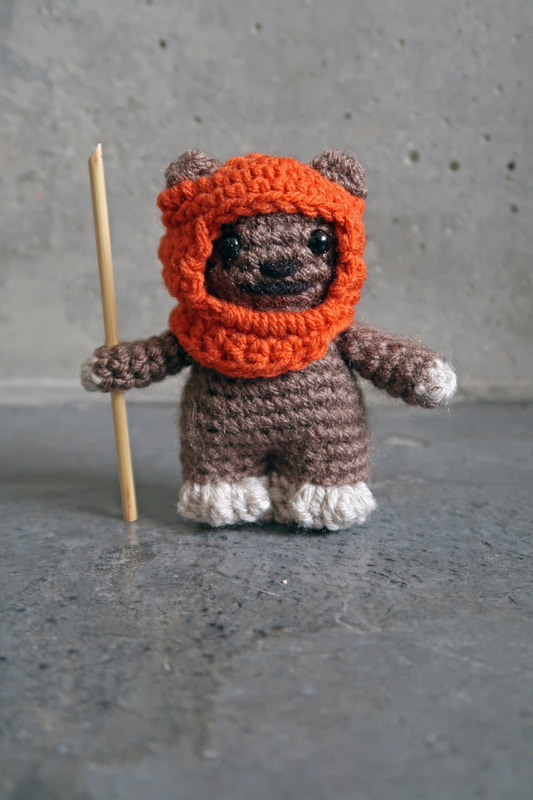
This must be one of the cutest things I have ever crocheted! So cute, I actually made two of these; the first of which I gifted to my sister which led to me making one for myself too. 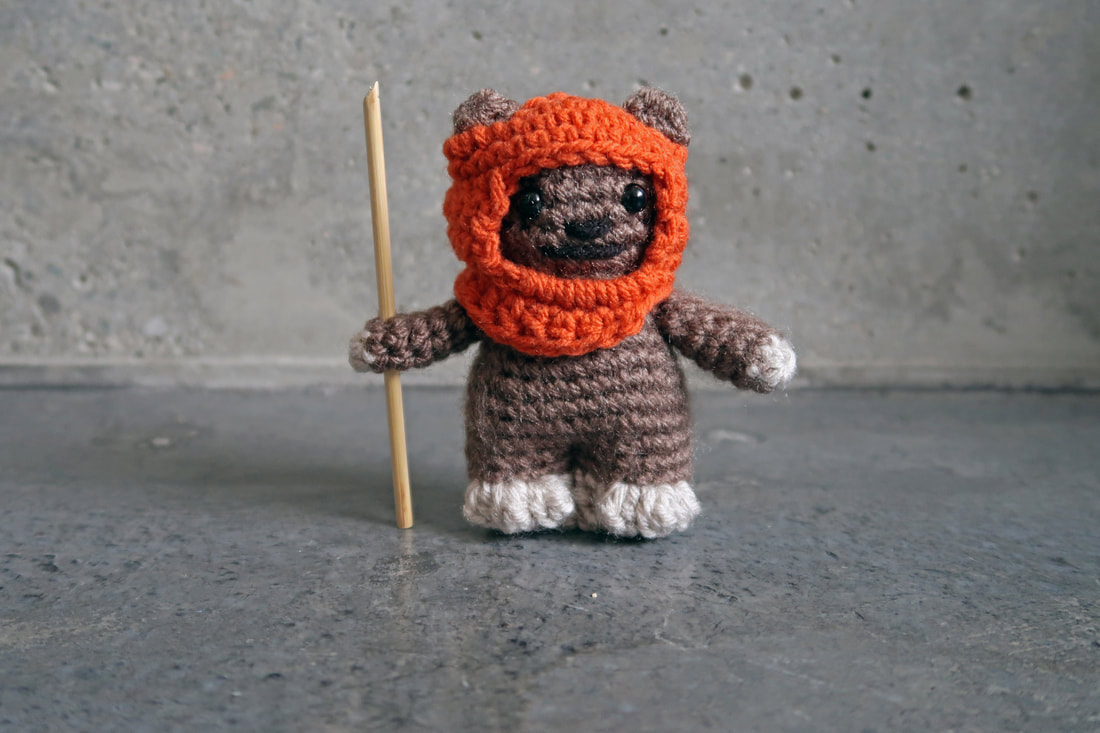 I have no complaints about the pattern by Lucy Collin - and why would I? He turned out so cute! Twice! Since I did make two, I did learn some things the second time around. On my first Wicket, I used Lion Brand, Lion's Pride Woolspun yarn (Pumpkin) for Wicket's hood. This yarn is a bulky weight [5] which made it a little difficult to work with a 3.5mm hook. So I would advise that you use a medium weight yarn [4] when using a 3.5mm hook.
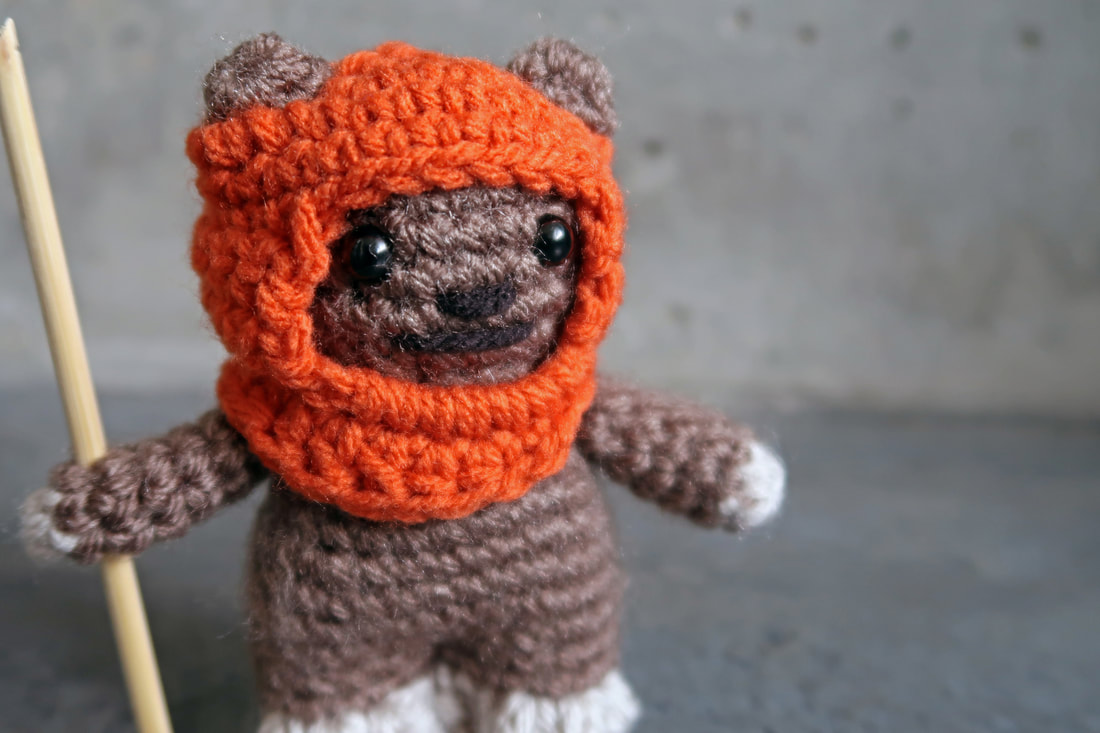
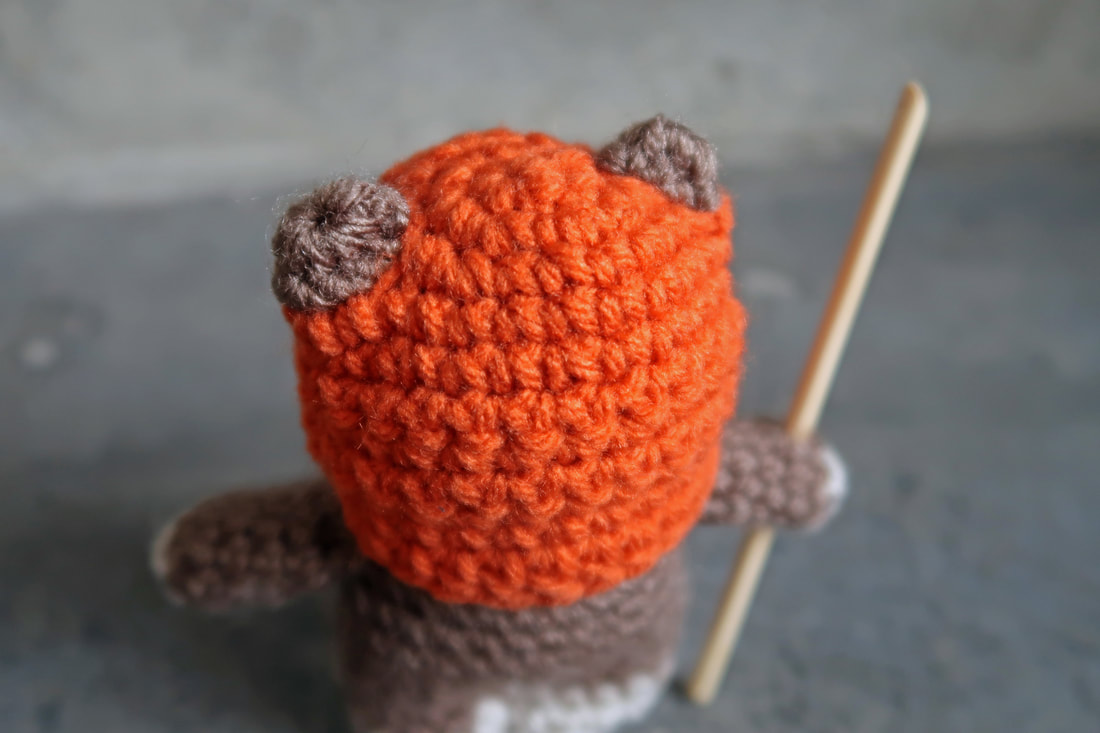
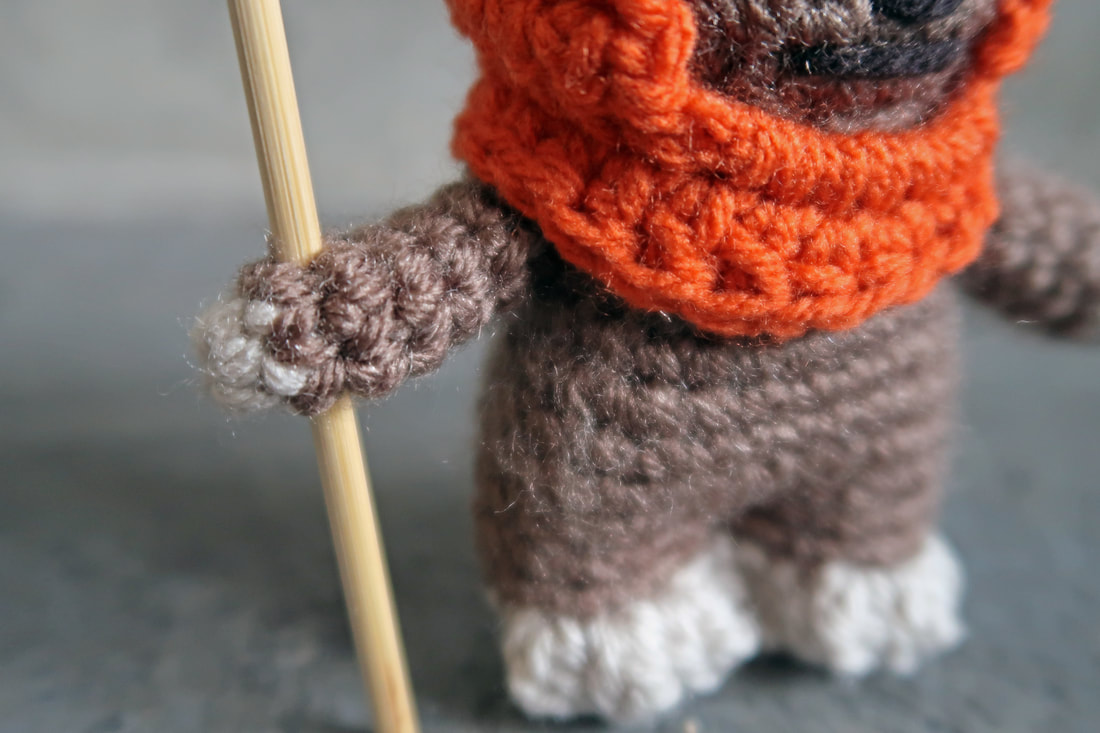
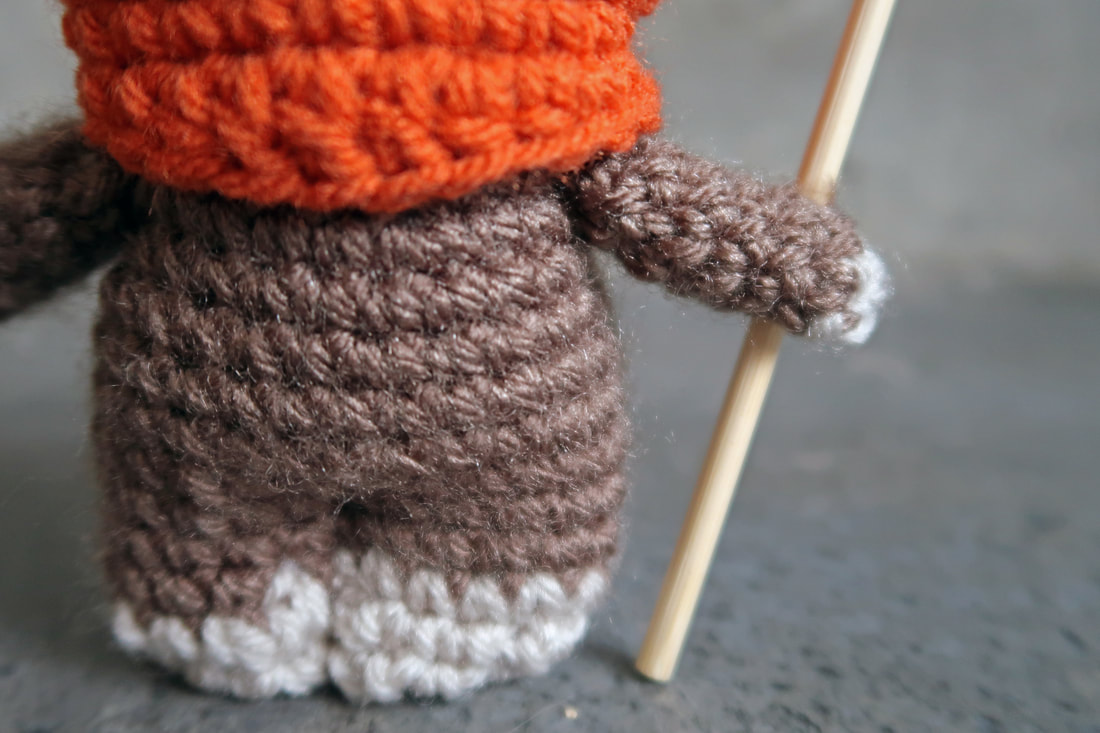
I also read the instructions incorrectly at the end of round 11 on the hood (this is the row directly below Wicket's mouth). Above is a side by side comparison of my first and second ewok. At the end of round 11, the instructions state to make 6 sc over a ch 6. Well, in the first ewok, I did not go over the ch 6, I stitched into the ch 6. Not a huge difference, but once you see it, you know it's different. As mentioned earlier, I used a bulkier weight of orange yarn the first time around. I really should have used a crochet hook larger than 3.5 mm to compensate for the heavier weight. As you can see, the first hood looks tighter and smaller; the hood's opening is smaller as well. On the second ewok, the hood is looser and drapes over the head nicely; you can also see Wicket's entire face. 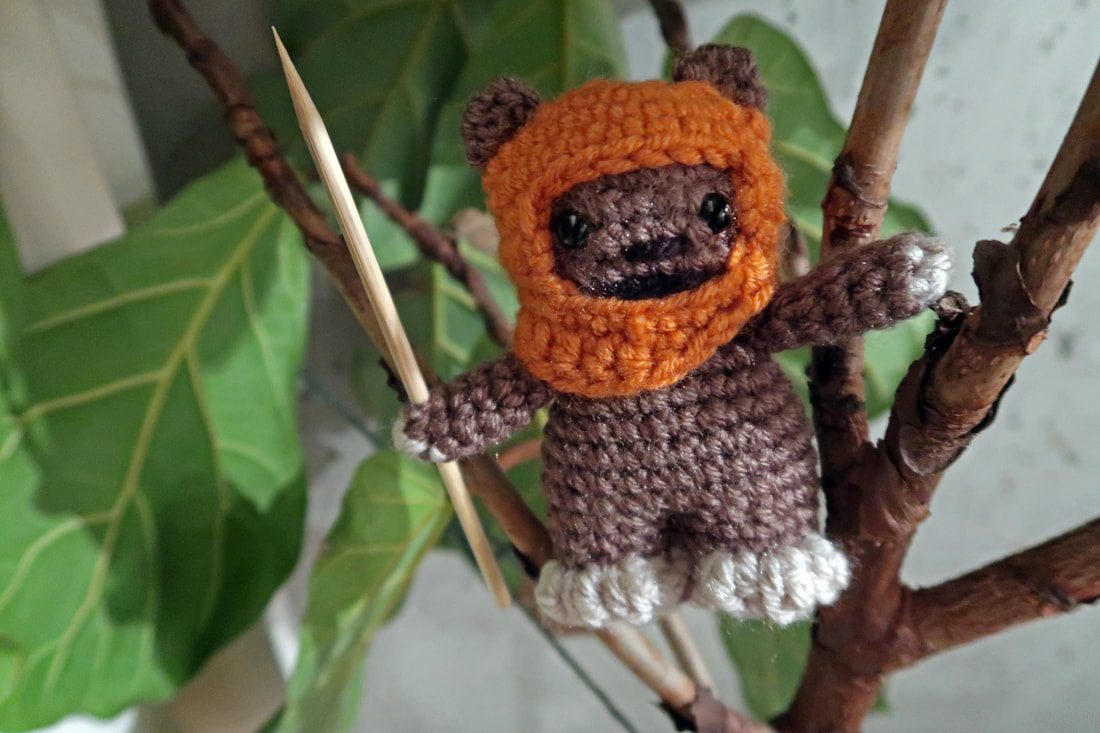 Both ewoks are approximately 4.7 inches tall; the finished size in Lucy Collin's book is listed as 3 inches tall. The photo of her ewok is also shown holding a toothpick; I ended up cutting a couple sections from a bbq skewer to make Wicket's spear as a toothpick would be much too small.
Pattern (not mine): http://www.lucyravenscar.etsy.com
Materials used: 3.5mm crochet hook, stuffing, safety eyes, bbq skewer. 1. Wicket's body: Lion Brand Vanna's Choice in Taupe; medium weight [4]. Approximately 20g needed. 2. Wicket's hands and feet: Lion Brand Vanna's Choice in Linen; medium weight [4]. Approximately 5g is needed. 3. a) Wicket's hood (The First): Lion Brand Lion's Pride Woolspun in Pumpkin; bulky weight [5]. Approximately 5g is needed. b) Wicket's hood (The Second): Loops & Threads Impeccable in Pumpkin; medium weight [4]. Approximately 5g is needed. A small amount of black yarn is also needed for Wicket's nose and mouth. This is one of many Star Wars characters I have made during the month of December. While I was Christmas shopping, a Star Wars crochet kit caught my eye when I was in the queue line. Obviously, I couldn't leave the store without one.
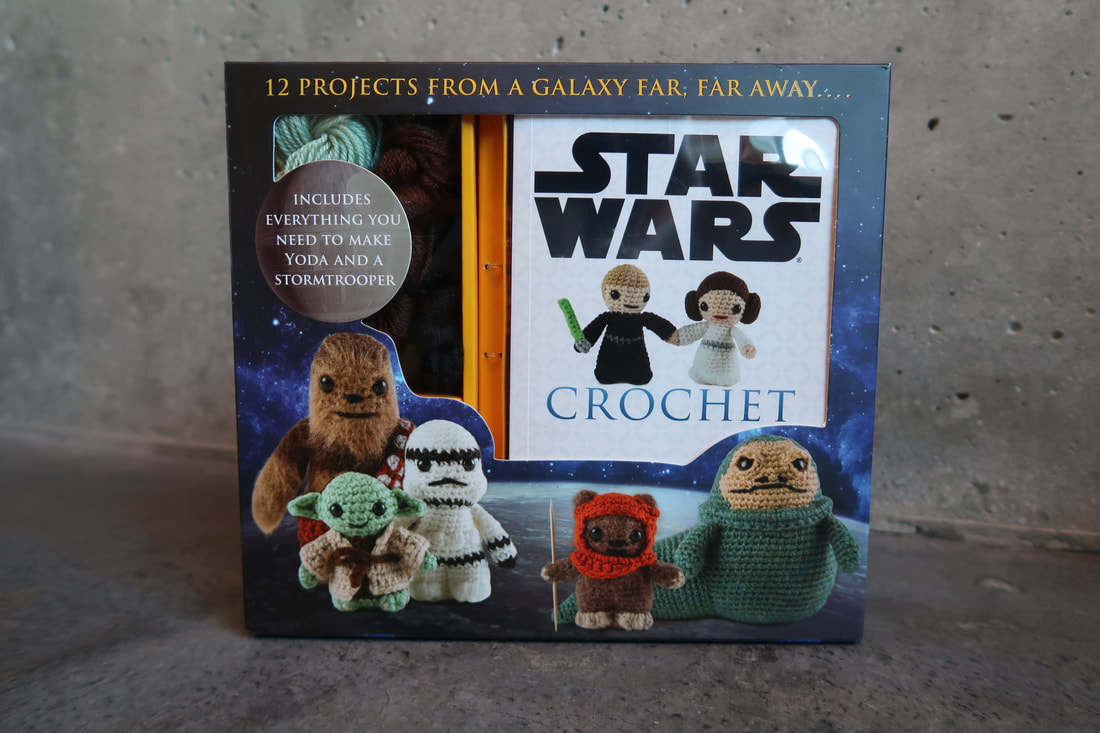
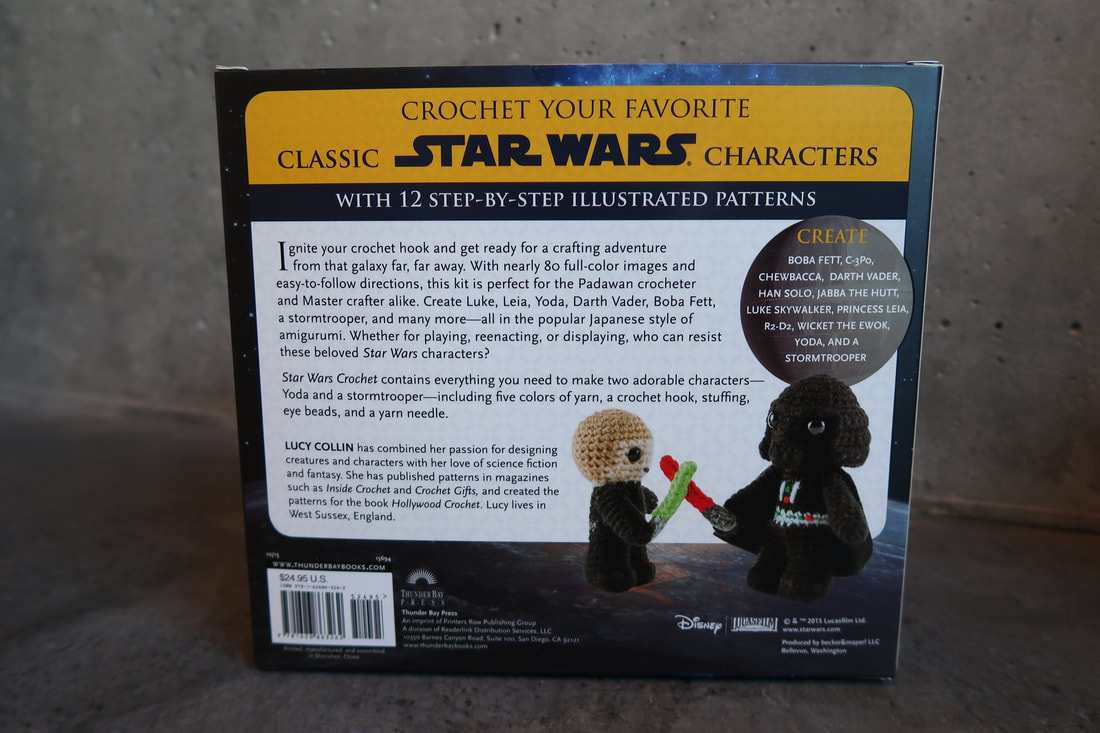
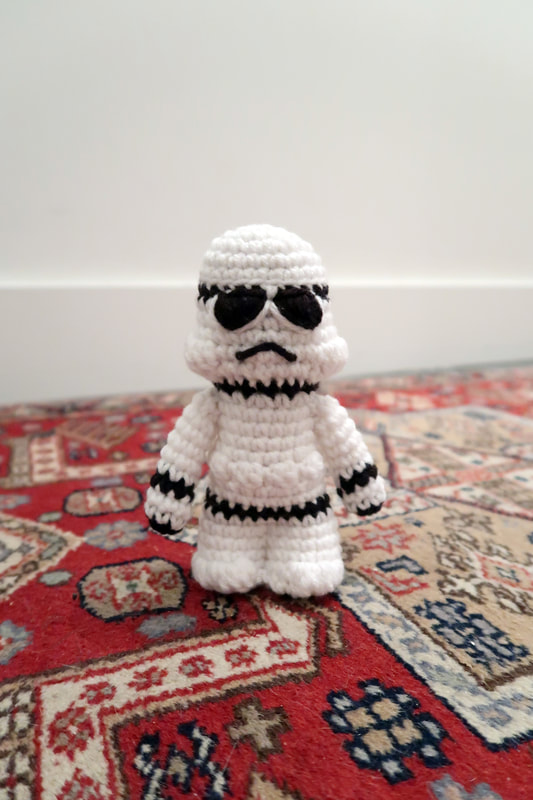
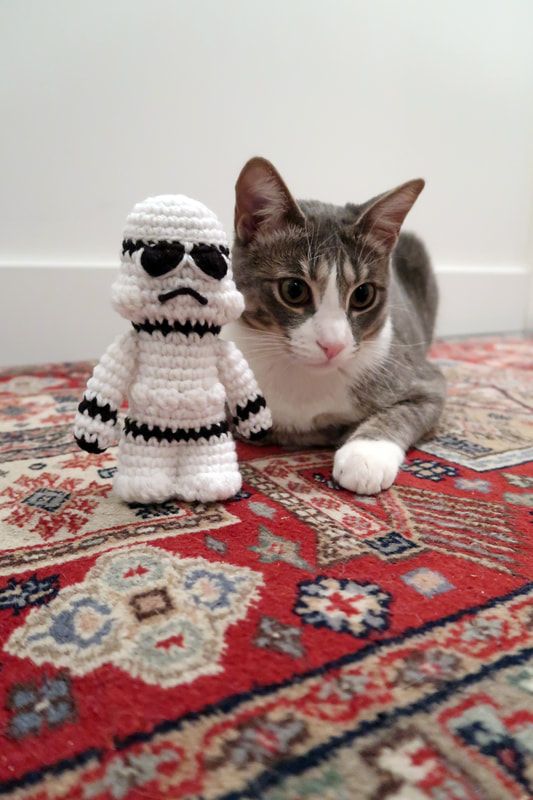
This kit includes patterns for 12 Star Wars characters written by Lucy Collin: 1) Yoda 2) Stormtrooper 3) C-3PO 4) Princess Leia 5)Wicket the Ewok 6) Luke Skywalker 7) R2-D2 8) Han Solo 9) Chewbacca 10) Darth Vader 11) Boba Fett 12 Jabba the Hutt Patterns can also be found in Lucy's Etsy shop (http://www.lucyravenscar.etsy.com). Also included in the kit are five colours of yarn (for Yoda and a Stormtrooper), stuffing, 3.5mm crochet hook, two sets of safety eyes, and a yarn needle. 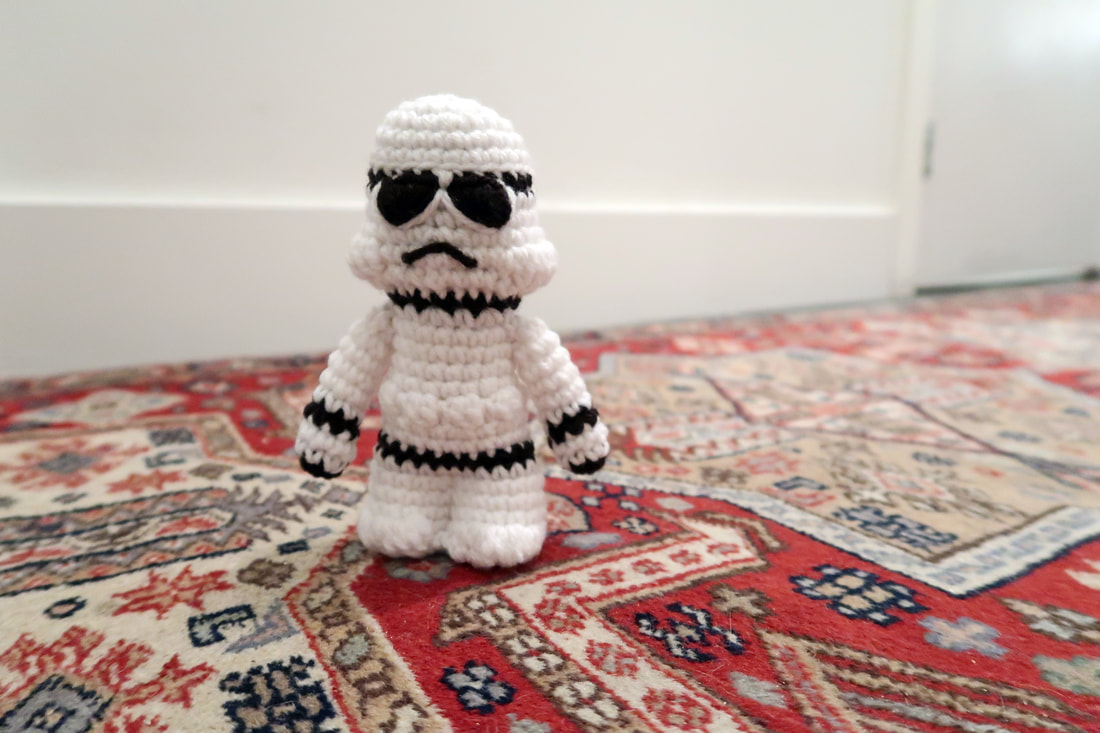 The pattern for the Stormtrooper was very easy to follow; some special techniques were used and instructions for these techniques are found at the beginning of the pattern book. The head, body, and legs are created in the round and is a single piece. The arms are created separately and then sewn onto the body. The pattern calls for the use of safety eyes which I chose not to follow and instead stitched yarn to create the 'aviator shades' as seen above. I felt that the round safety eyes would not have been true to the character.
The finished size of my Stormtrooper is approximately 5 inches tall; the pattern says 3.5 inches. However, I ended up not using the yarn included in the kit. I used some leftover Loops & Threads yarn which is a slightly thicker yarn than what is included in the kit, thus my Stormtrooper is a slightly larger size. This Stormtrooper took me approximately 2.5 hours to complete and I was quite pleased with the simplicity of the pattern, the finished size and the final look. It is definitely something I would make again, and probably will have to as I happily gifted this one to a friend! Visit my blog again to see what other Star Wars characters I have completed! Materials used:
3.5mm crochet hook 1. Loops & Threads Impeccable yarn in White (medium weight [4], 253m/127.5g). Approximately 25g of white yarn is needed. 2. Loops & Threads Impeccable yarn in Black (medium weight [4], 253m/127.5g). Approximately 5g of black yarn is needed plus a little more if you stitch the eyes as I did. To get into the Christmas spirit, I wanted to crochet something Christmas-y. I was looking for something quick, something new, and something I could gift to my lovely coworkers. It needed to be something that I could repeat and complete in a timely manner. So I decided to make personalized Christmas ball ornaments! 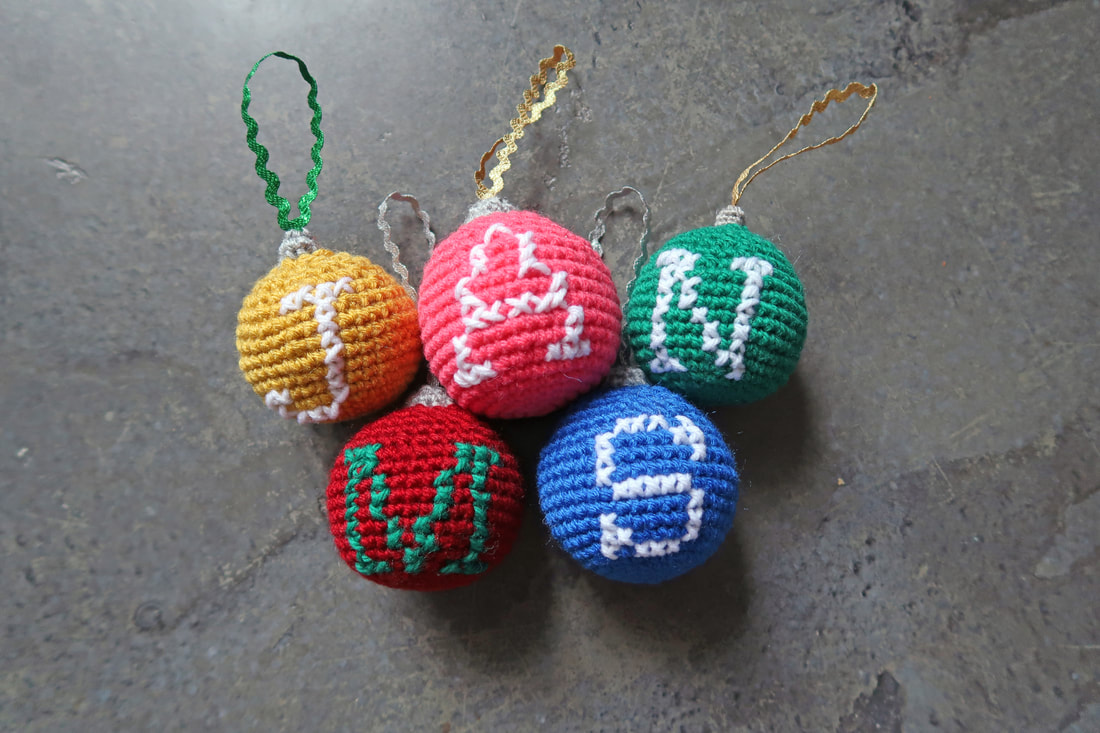 Something quick: I completed each ornament in about a hour and a half (including cross-stitch and finishing time). I followed the patterns for the 20-row and 22-row sphere (click here for a free pdf copy from Ms. Premise-Conclusion).
Something new: I had not made these before so it was fun figuring out the best way to make these, what colours to use and how to attach a ribbon for hanging. I decided to cross-stitch a letter on to each ornament. I looked up some free cross-stitch templates online and followed the template for each letter. Each letter was complete before stuffing and closing the ball. Cross-stitching definitely got easier (and better looking) with each letter I stitched. Cross-stitching is easiest when you have a grid to follow which worked for the most part except where I hit areas where there were decreases. Whenever I hit a decrease I had to improvise a little in order to keep each cross-stitch consistently the same size throughout. This project was also great way to use up some leftover yarn as very little was required for each ornament; for once I didn't have to go out and buy more yarn!
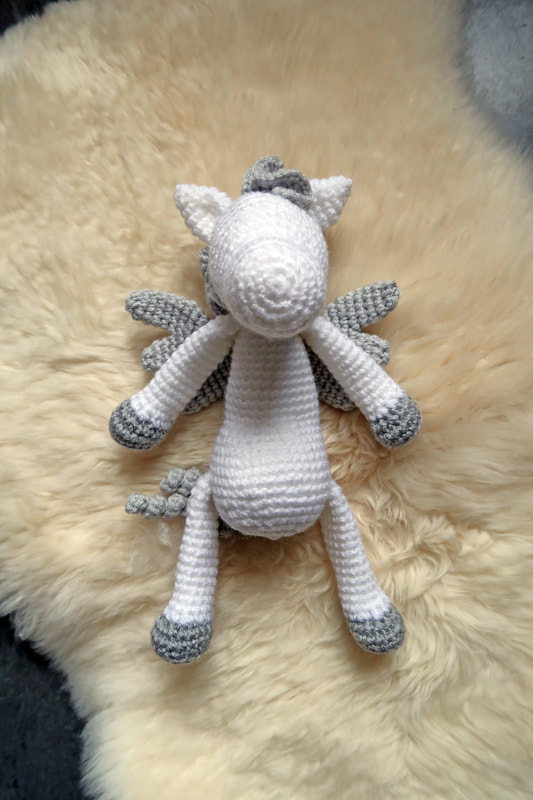
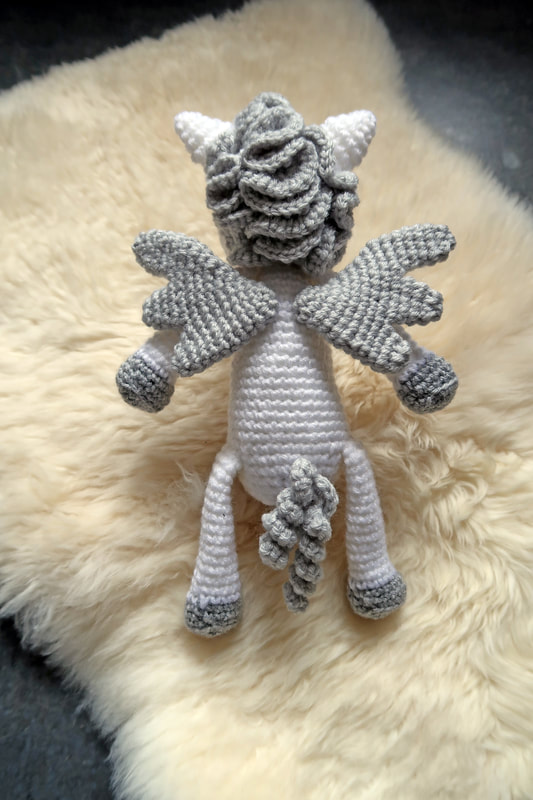
Pegasus was created using my own pattern which is based off of the same pattern I created for my unicorn.
Materials used: 4.25 mm crochet hook 1. Lion Brand "Vanna's Choice" in white (medium weight [4], 156m/100g). 2. Lion Brand "Vanna's Choice" in pale grey (medium weight [4], 156m/100g). 3. Lion Brand " Vanna's Choice" in silver heather (medium weight [4], 156m/100g). Stitches: Slip Stitch Chain Single crochet Techniques: Magic circle Crochet in the round Increase Invisible decrease Colour switching Branching Hand-sewing |
Melissa LuangsiripanyaHi there! I'm a self-taught casual crocheter. Here you will find more details on how I made my projects as well as stories of hardship, frustrations and success! Archives
July 2018
Categories
All
|